Playroom Makeover

Do you have a play room or living room that looks like a tornado went through it? Oh, and you just cleaned it yesterday? Me too.

We have three kids and a lot of toys. I have bins and baskets aplenty in their playroom, but even with clear organization procedures, the room gets wrecked in a matter of hours. The room gets so messy that the kids no longer want to be down there, and they start bringing their toys upstairs instead of picking up. I get frustrated and yell at everyone and rage clean every once in a while. It’s impossible (at least for our household) to try to keep up with a play room this size. I got tired of yelling at my family and decided to take matters into my own hands. That’s it, mom’s redoing the playroom!

The playroom theme was great before — all the color in our house was in one place. We had a fun pink couch. I obsessively sourced colorful animal art canvases from different HomeGoods around the country (that’s right, it took a whole year). I set up a kids table with bright yellow chairs. It was such a happy place! But after the photo for the ‘gram, my kids would wreck it every day because there were no clear places to put things. You can have all the bins and baskets in the world, but your kids aren’t gonna use them. At least mine don’t; they move fast like their dad!

Anyway, I had my eye on the Rifle Paper Co Dog Days wallpaper for quite some time, and I decided to pull the trigger when it was on sale. I mocked up the room (around the mess!) based on the colors in this wallpaper, and the color palette alone was worth sharing! I totally forgot to bring the wallpaper sample with me, so I used a photo of the wallpaper and the Sherwin Williams app while I was in the store to come up with my colors. I pulled colors from the dogs’ tongues and sunglasses to make a color palette! Sherwin Williams Tricorn Black, Pinky Beige, and Pressed Flower make such a fun color palette to play with! For reference, the wall leading upstairs from the playroom is White Flour (our whole house is painted Sherwin Williams White Flour).

After we got the wallpaper started, I decided I wanted to paint our ceiling black, to make it more of a theater effect (we have a projector screen instead of a TV, it’s a story). I quickly mocked it up in Photoshop, real life mess included, to see what it would look like:

And now we paint!

Follow along on instagram stories @firsthouseonfinn to see how the playroom is coming along!

2022 Christmas Mantle

The 2022 Christmas mantle has been completed, and so far it’s only fallen down once! It actually looks a little different than these photos now, after it fell and I redid it, and I like it even better! I can pretty much guarantee it’s going to fall at this point, so I don’t get too attached to any of my designs. I always say it goes faster and turns out better the second time, but a third time is gonna piss me off. ;)

Anyway, I used two of the same faux cypress garlands from last year, the mixed greenery garland from Dillards, and one red berry garland here. I used garland as my base layer to fill the space quickly. I then filled in with red florals from Sundance, and more red berry stems and picks. Exact numbers listed out below—

To recreate this look, you’ll need:

4 Vermilion flowers from Sundance
2 Ruby flowers from Sundance
2 (packs of 15) red berry picks from Amazon
2 red berry tree picks from Crate&Barrel
2 cypress garlands from Crate&Barrel >> sold out but linking similar
1 mixed cedar garland from Dillards >> sold out but linking similar
1 red gerry garland from Crate&Barrel
1 Anemone flower from Sundance
1 (pack of 30) red berry picks from Amazon
1 (pack of 24) red berry picks from Amazon
1 (pack of 12) red berry picks from Amazon
1 set Stargazer lights from Terrain
Command hooks

Shop Sundance | Shop Crate&Barrel | Shop Amazon


MIXED GREENERY
GARLAND

BY DILLARDS [SOLD OUT]

CYPRESS GARLAND

BY CRATE & BARREL [SOLD OUT]

RED BERRY
GARLAND

BY CRATE & BARREL

VERMILION
FLOWER

BY SUNDANCE


These garlands layered together create the most realistic, full garland! I added red berries in this year to tie in with our red and ivory family stockings from Crate & Barrel. The Stargazer curtain lights from Terrain make the whole room magical when we turn them on. I just love how everything looks woven together on our mantle!

Have you decorated your mantle for the holidays with garland this year? Let me know in the comments below or over on instagram @firsthouseonfinn!

Rachael YoungComment
Favorite Things Giveaway 2022

I have always wanted to host a “favorite things” party, but the time just gets away from me each year. Instead of scrambling to try make it happen this year, Garret and I decided to do a giveaway featuring his & hers bags of our favorite things! I can’t wait to show you what’s inside each bag!!

ENTER CONTEST HERE

A backstory: Why am I giving more things away??

I took the Good Influence(r) course by Chris Loves Julia, and it turns out, influencing is not for me. I personally don’t feel comfortable asking companies to pay me in addition to receiving free product, and that is the whole premise of the course. That’s the whole premise of being an influencer! I totally get it — staging photos is doing work for a brand, and your time and work deserves payment. This is the job for many influencers, but I personally already have a full time job that I love, and I “influence” as a hobby only.

I made the unpopular decision to stop trying to get more followers and engage with my current followers, and that switch changed everything for me. Social media is fun again! I stopped striving for perfection, hoping someday Studio McGee or Pottery Barn would notice my account. I stopped trying to figure out what the algorithm wanted, and started finding ways to use my account for good — to reach others and build a sense of community. And with that, comes the desire to do a really fun giveaway for my community!! We want to utilize a giveaway to thank those who already support us, rather than using a giveaway to bring in new followers. So with that…

Garret and I each filled a bag with our favorite things of 2022.
Now it’s time to give these bigs away to two lucky winners!!

Miss the giveaway? Use these as a gift guide!

GIFTS FOR HER
01 / 02 / 03 / 04 / 05 / 06 / 07 / 08

GIFTS FOR HIM
01 / 02 / 03 / 04 / 05 / 06 / 07

Giveaway ends December 15, 2022 at midnight eastern.
Follow along on our holiday adventures @firsthouseonfinn!

Rachael YoungComment
Donut BOO! Printable

Despite the fact that we’ve had our Home Depot 12ft skeleton up since the middle of September, it’s finally officially Halloween season!! Since we moved to our neighborhood, I’ve enjoyed keeping the “You’ve been BOO’ED” tradition going each year. Halloween is my favorite holiday! COVID changed things, and I switched my approach to the “donut BOO.” Drop off surprise donuts on your neighbor’s doorstep, DoorDash style, with a cute BOO note. Who doesn’t love surprise donuts?

To start the tradition in your neighborhood this October, download the free PDF below and print (note: it looks best printed US Letter Borderless). Get your favorite donuts, and drop them at a neighbor’s doorstep along with the two prints! It’s that easy to get in the Halloween spirit and totally make someone’s day. Here’s to October!

Tag me @firsthouseonfinn if you #DonutBOO this year!! I’d love to see!


Donut artwork under license. Do not reproduce without permission.

Samsung Frame TV Art: Cute Halloween ghosts that aren't scary

I fell in love with this whimsical ghost in a field painting by Katherine Blower. I really don’t have a place where I change out artwork seasonally in my home, besides my Frame TV, but I was now determined to have this print.

Etsy is usually the first place I look for Samsung Frame TV art, and lo and behold, Katherine Blower is on there!! I reached out to her to see if she would make a Samsung Frame-sized ghost for me, but the answer was a definite “no.”

If you know me, you know I wasn’t going to let that stop me! I searched Etsy for similar paintings and finally found an Etsy seller that was willing to make me a cute ghost for my TV.

HeriloomLaneCo on Etsy made the artwork for my TV, and listed it in her shop for you, too! It’s Halloween without being too Halloween in September, if you know what I mean ;) It’s currently listed at 50% off at time of posting!

 
Rachael YoungComment
Spring Series Part 1: Moving Tips

I’m beginning a new series this spring, sharing tips from our start-to-finish home build experience. Today we’re starting off the series with the very beginning of our new build journey: the cross-country move

Now we are not planning on moving anytime soon, but after renting various places for a decade and a cross-country move (two for Garret!), we have certainly learned a thing or two about moving. Our last and final move was from California to Ohio, where we first moved into temporary furnished apartment before our final stop. We then moved again, six months later, to our permanent house, where we are staying put!

Moving tip number 1: Be extremely selective when packing.

We used a pod for our cross-country move, so we had to be extremely selective about what we packed to take with us. It honestly filled up much quicker than we anticipated, and we ended up having to sell some larger pieces in order to make it work. Sometimes you just have to weigh the cost of your item versus renting an additional pod. Donate items, sell items on Facebook Marketplace, whatever you need to do to clear out — do it! In the end, when we finally moved into our new home in May 2018, I was so glad that we had downsized everything to a pod. An empty new home is overwhelming by itself, without having the added stress of placing your old furniture into your new place. Don’t be afraid of change — this is the time for change! 

Moving tip number 2: Be extremely selective when choosing a mover.

We’ve all heard horror stories about moving companies. I followed along with the Chris Loves Julia moving company drama, and the whole thing was just horrible. I learned from their experience that this happens quite often, with moving companies scamming people and then changing names and starting a new company to do the same thing all over again to another person. We did not have this experience when we moved, because I used a trusted service that I had used previously and had a good rapport with. Do your research and hire a company with good reviews and years of experience, like Bearded Brothers Moving Group, LLC. Bearded Brothers Moving Group is a trusted long distance moving company in Youngstown, Ohio that can handle moves of all sizes. They have the expertise, the resources, and the manpower to facilitate all the details of your move from beginning to end. They even provide packing services!

Moving tip number 3: Use used boxes (if possible).

Did you know you can purchase boxes? You can get all sorts of boxes from your local FedEx, UPS, U-haul, USPS, etc. I even found a wardrobe box at U-haul that had a bar across the top so I could hang all the clothes straight from my closet! Plan ahead for a surprisingly hefty cardboard box budget if you’re doing the moving yourself. Most moving companies supply their own moving boxes, but if you are moving on your own, remember that boxes can add up very quickly. We were lucky enough to be able to use a lot of boxes that a friend in California was passing on for our big move from California to Ohio. People move all the time, so it’s always worth checking around the neighborhood or Facebook Marketplace to find boxes for your move! 

Moving tip number 4: Label everything.

We started by organizing (and labeling) each box by room, which is called macro organizing. Once we had our boxes organized by room, we started micro organizing, breaking down categories even further. For example, I labeled a box “kitchen appliances” within the even larger “kitchen” box. When the moving boxes are all in an overwhelming heap at your final destination, you’ll be so glad you labeled everything, trust me. It makes unpacking efficient and way less stressful! 

Moving tip number 5: Hire the movers. Seriously — just hire the movers!

Garret’s favorite summer job was working for Housing and Dining at Carnegie Melon. He considers himself a moving expert, and doesn’t like to ask for help when we move. When you have a family and work full-time though, sometimes your time is worth hiring certain tasks out. There just aren’t enough hours in the day! My best tip for moving is to stop being stubborn and just hire the movers. There has never been a time in my life where I regretted having moving help. Moving companies are experts in the field, and when you find a company that you can trust, they are worth their weight in gold!


Disclaimer: We built our home with Fischer Homes, a local home builder, so our experience might be different from yours. This post is sponsored, but all experiences and opinions are my own.

Follow along for the latest on instagram @firsthouseonfinn!


Laundry Room Refresh

It’s starting to feel like spring, I’m cleaning and organizing everything that I ignored all winter, I’m planning our pantry/mudroom project… and all of this got me in an organizational mindset that landed us here… the laundry room refresh.

Our laundry room is honestly one of the things that sold me on this house. I’ve seen it all, laundry-wise, throughout the years of renting. Laundromats, communal washers, washer/dryer in the garage — seriously, when I saw the laundry room perfectly situated between all the bedrooms in this house, I was sold.

We did a little renovation to the laundry room in our early DIY days, and while it was a nice spruce up, I started feeling ready for a change from the farmhouse feel. Back in 2019 we added white shiplap to the walls, did peel and stick tile on the floor, added some decorative shelving and a large sign, and Garret built a waterfall style wooden countertop above the washer/dryer and around the sink. Oh yeah, we changed out the wash tub for a proper sink, too!

I am keeping a lot of these elements, but adding cabinetry for storage, and adding black shiplap to the ceiling for some decorative drama. You can see the laundry room ceiling from many points in our 5-level floorplan, so I think the ceiling is a great place to capture attention. Sherwin Williams Black Magic can be found all throughout our house, so the color was an easy choice.

I’ll show you the before state of our laundry room here:

And now for my plans! I’m going to:


And I think that’s it! We already got a start on the ceiling and cabinetry earlier this week, and it is amazing what black paint can do to transform your space! I stop and admire the way the light hits against the black ceiling every single time I go by. I can only imagine how much more I’m going to love doing laundry for my family of five when the project is complete! ;)

Follow along on instagram stories to see how our laundry room refresh project is coming along @firsthouseonfinn!


Shop the Post

 
Valentine's Day Frame TV Art

Looking for Valentine’s Day art for your Samsung Frame TV? I’ve done all the scrolling on Etsy so you don't have to!

I’ve found 14 art prints for your Frame TV this February 14. These prints are also high-res enough that you can print them and put in a frame, if you don’t have a Frame TV!


FRAME ART 1

FRAME ART 2

FRAME ART 3

FRAME ART 4

FRAME ART 5

FRAME ART 6

FRAME ART 7

FRAME ART 8

FRAME ART 9

FRAME ART 10

FRAME ART 11

FRAME ART 12

FRAME ART 13

FRAME ART 14


Happy Valentine’s Day!!

 
Rachael YoungComment
Happy New Year | Samsung Frame TV Art

It’s almost 2022!! I can’t believe it! I started searching Etsy, my favorite place to find Samsung Frame TV art, but I couldn’t find anything I wanted to display on my TV this year.

I was inspired by this print, and had the Taylor Swift song stuck in my head already at this point, so I made my own “Happy New Year” print, fit for the Samsung Frame!

Even if you don’t have a Frame TV, you can print this and put it in any frame for your New Years Party. Guaranteed to get a smile by Taylor Swift / pop music fans in your life! :)


Download the free “I’m Feelin’ 22” Samsung Frame TV art:

 
Rachael YoungComment
Christmas Mantle 2021

The Christmas Mantle for 2021 has been completed, and it’s my favorite one yet! I used the same faux cypress garland from last year, and added in two more that I found from an unexpected place! Investing in quality faux garland can last you for many years, and I have found many good ones over the years! Like seriously, I have a faux garland obsession 😍

To recreate this look, you’ll need:

3 cypress garlands from Crate & Barrel >> sold out but linking similar: cedar twig garland
2 garlands from Dillards (snip off pinecones)
1 set Stargazer lights
Command hooks
Optional: Ribbon
Optional: Bells


MIXED GREENERY
GARLAND

BY DILLARDS

CYPRESS GARLAND

BY CRATE & BARREL [SOLD OUT]

CEDAR TWIG
GARLAND

BY POTTERY BARN

NORFOLK PINE
GARLAND

BY KIRKLANDS


These 5 garlands layered together (and secured with command hooks) create the most realistic, full garland! I added a bit of red ribbon and some vintage bells on the left corner, and our family stockings on the right corner. The Stargazer curtain lights from Terrain make the whole room magical when we turn them on. I just love how everything looks woven together on our mantle!

Have you decorated your mantle for the holidays with garland this year? Let me know in the comments below!
Or over on instagram @firsthouseonfinn!

Rachael YoungComment
Last-Minute Holiday Bathroom Surprise

The kids are at ages now where I can really have fun with creating the magic of Christmas for them! I came up with a master plan this year, but of course with all the shipping delays, nothing arrives on time. So for this year, our Elf on the Shelf is set to arrive on December 1st, bringing an advent calendar for each kid, starting in the bathroom. You read that right, I’m going to start the elves in the kids’ bathroom! It hit me that I spend time decorating the house how I like it for the holidays, not considering that the kids are the ones I should be decorating for. The opportunities to create Christmas magic as a parent are finite — they’re only little believers for a few years, when you really think about it!

If you’re like me, and just now coming to this realization mere days, or hours, before December 1st advent calendar time, I’ve got you covered! I ordered the cutest kids holiday decor from the H for Happy line at Bed Bath & Beyond, and I got free same-day delivery with my $39 order!! They also had options for store pickup or fast shipping!

So here’s my plan when they go to sleep on the 30th: I’m going to switch out the shower curtain, towels, and bath rugs, hang a colorful pom wreath on the door, switch out the prints in the photo frames (that I ordered for same-day pickup at Meijer), and let the “elves” have some fun with red and green bath paint! I got my Crayola bathtub paint at the Target dollar spot, but I’ll link similar slime below if you don’t have a Target nearby!


Last-minute Elf on the Shelf Bathroom Supplies - These were all 50% off today at time of posting!


BED BATH & BEYOND, $20

BED BATH & BEYOND, $20

BED BATH & BEYOND, $4


BED BATH & BEYOND, $20

BED BATH & BEYOND, $20

BED BATH & BEYOND, $33


I can’t wait to see it all come together! And I definitely can’t wait to see their surprised faces when they go to brush their teeth in the morning!!

What are you and your elves up to this season?

Rachael YoungComment
The Ultimate Teacher Gift Guide

Stop right there — Not another candle!! 😱
I’ve got the ultimate gift for your kids’ teachers this year!

Teachers are needed and appreciated now more than ever. If you want to show your appreciation with a practical, thoughtful gift they won’t throw away, here’s what you need:

First, get your hands on one of the infamous Bogg bags. They’re like Crocs shoes but a bag, and they come in every color. Don’t get scammed, these things are HOT! Only order direct from Bogg (restocks on Monday mornings!) or one of the affiliated shops listed on their site, like Dillards or Callahan’s Gifts, both of which I’ve personally ordered from before.

Next, support a small shop by ordering a coordinating Bogg tassel on Etsy. I’ve linked the tassels I love - the possibilities here are endless!

Fill the Bogg bag with supplies your classroom is needing, like paper towels, tissues, crayons, etc. Crayola even has bulk options like class packs! Maybe add in some chocolate or Sugarfina candy boxes, something just for fun and just for the teacher.

Bogg bags are huge and teachers love them for hauling school supplies back home. This also means they’re huge… so it takes a lot of stuff to make it a proper looking gift. I suggest going in on this gift together as a class, or plan on stuffing the bottom part of the Bogg with the big stuff like paper towel rolls, ziploc bags, and tissue boxes. The Bogg itself is a cool gift! 😉

Do you have a Bogg Bag? I gotta know your color! What color would you pick for me? Hint: I have two!

I appreciate it when you shop my posts using ShopLTK affiliate links!:

Rachael Young Comments
Redfin Article Feature

Stunning Wreath Decorating Ideas to Adorn Your Home All Season Long

When it comes to festive decor, wreaths are undoubtedly one of the most popular and classic options to bring holiday cheer to your home. And with so many different options, from classic florals to show-stopping festive ornaments, decorating with wreaths doesn’t have to be limited to just the holidays - with a few simple swaps, you can seamlessly transition your wreaths to suit the season. 

We rounded up experts from Victoria, BC, to Tampa, FL, for their best wreath decorating ideas to adorn your home. Whether your style is whimsical and playful or rustic and organic, take a look at these wreath design ideas to find one (or a couple) that’ll speak to your home’s aesthetic. 

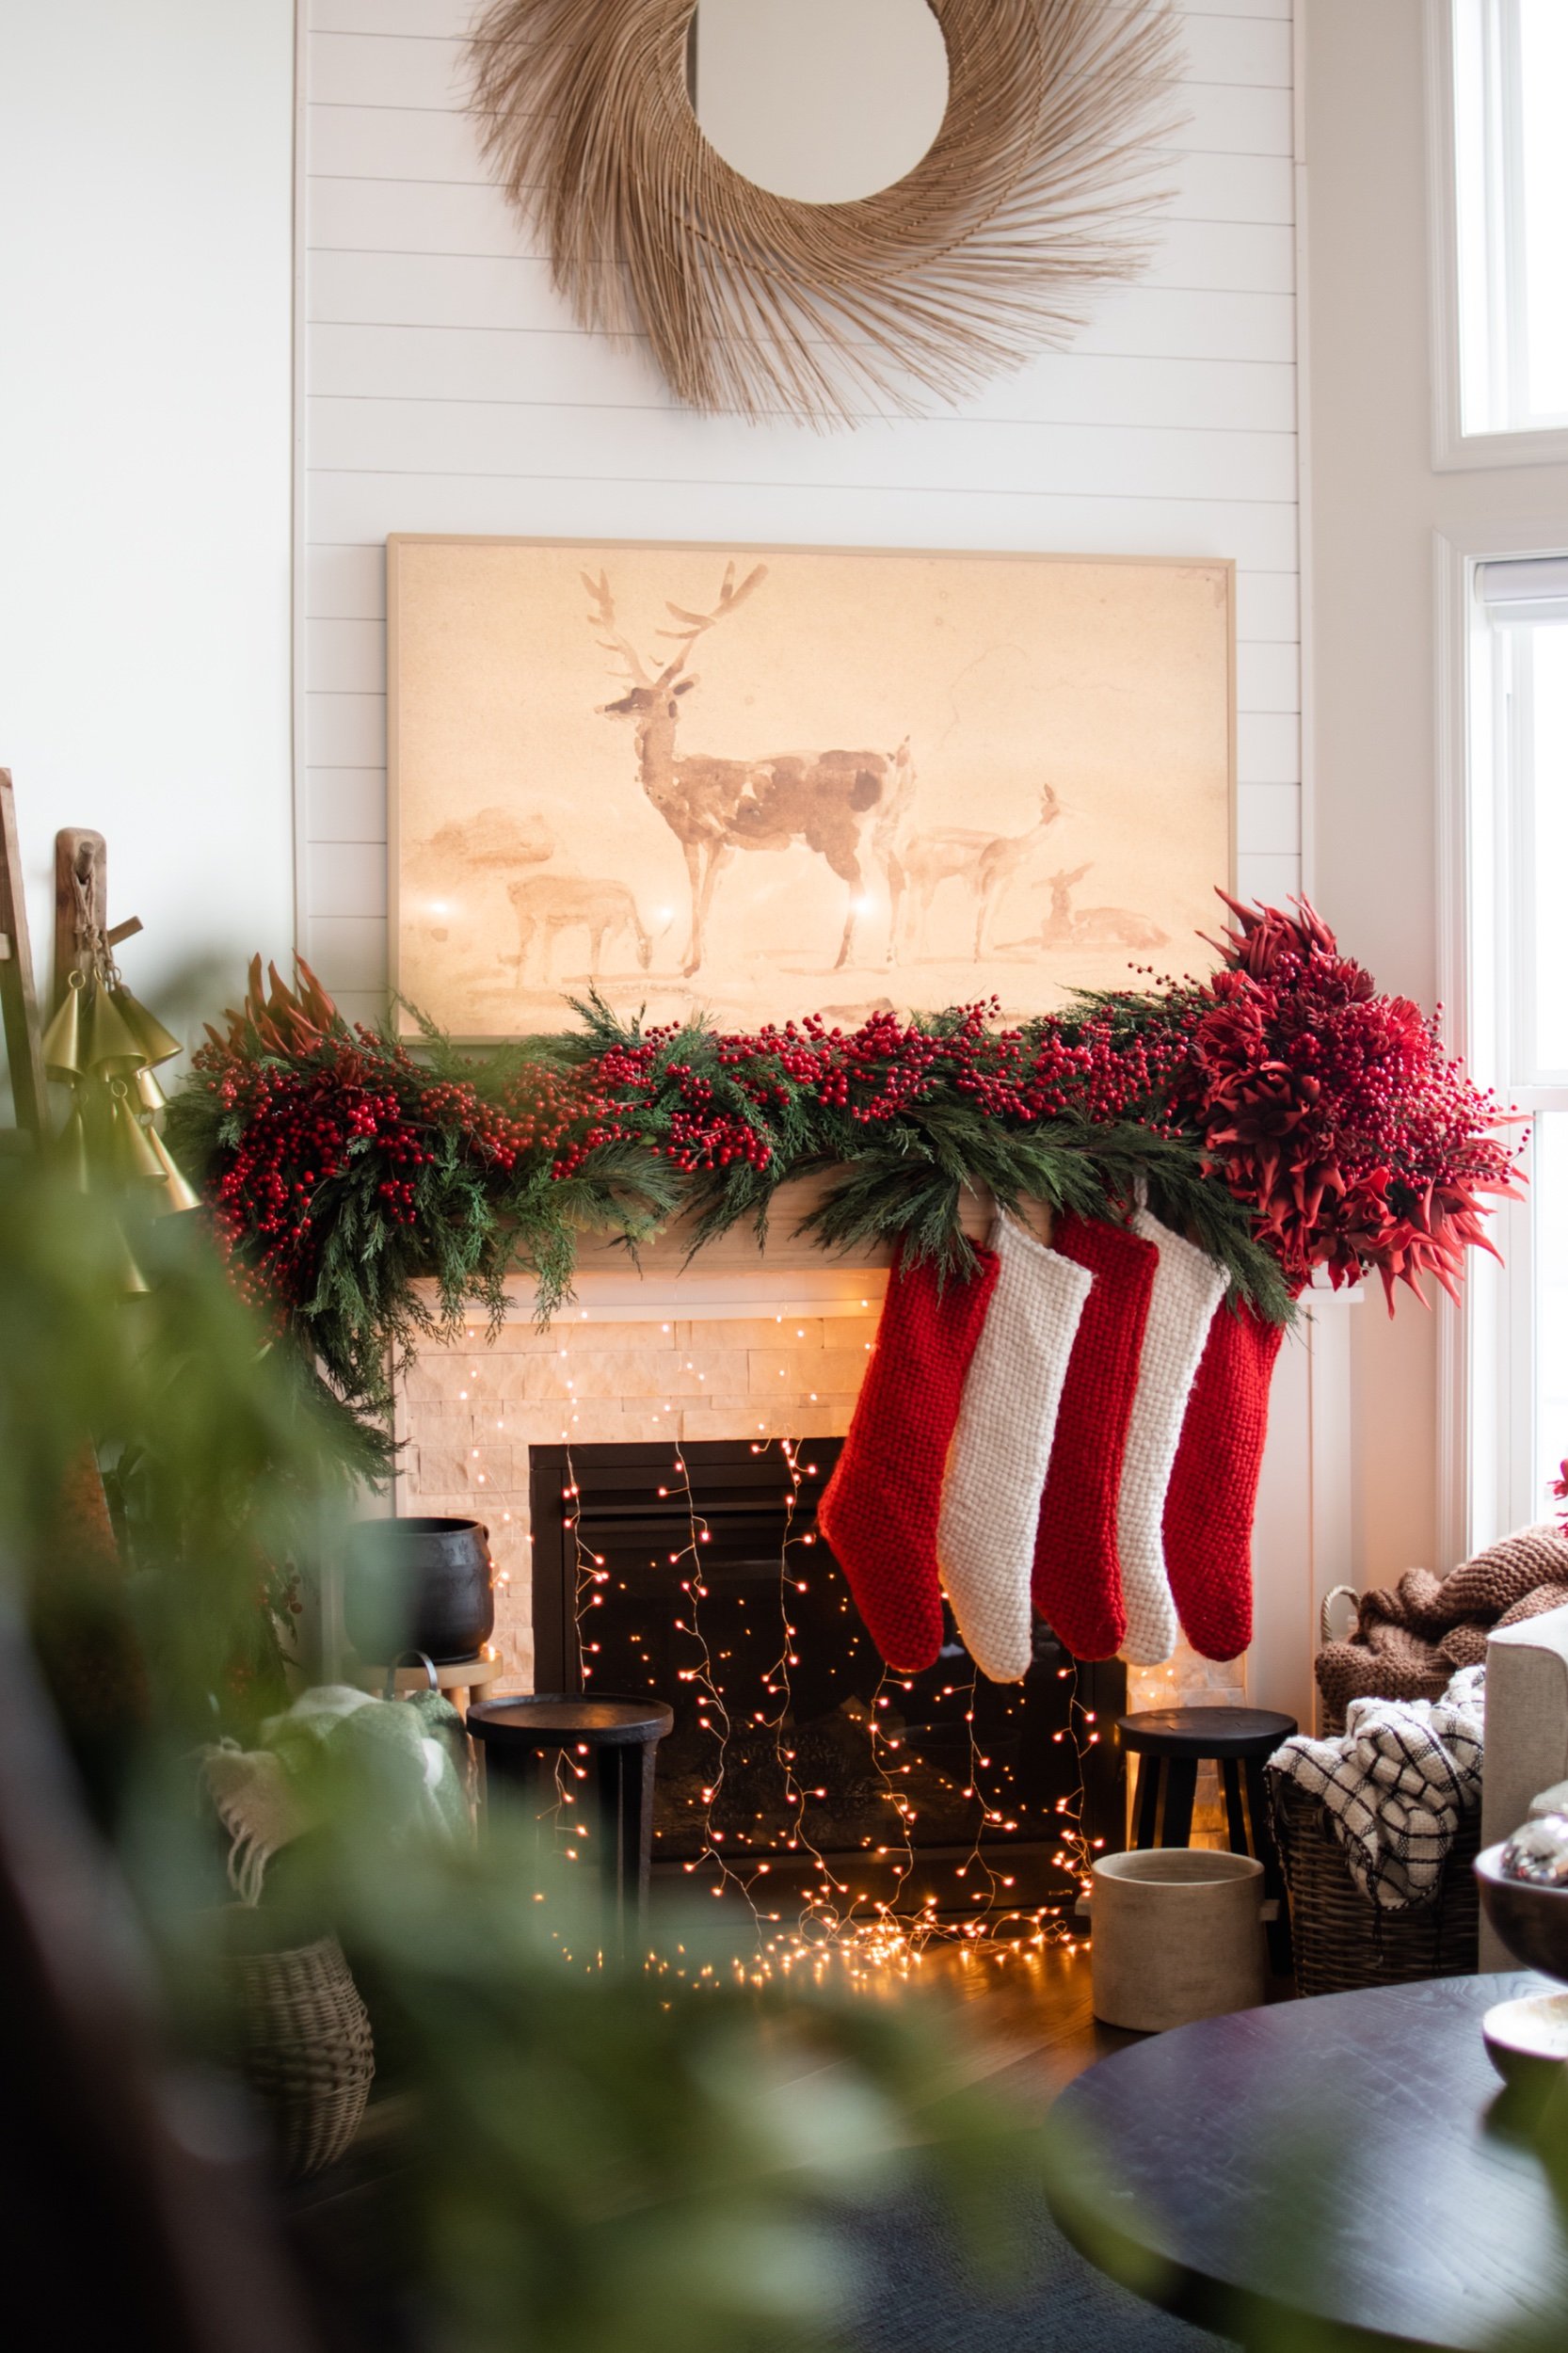
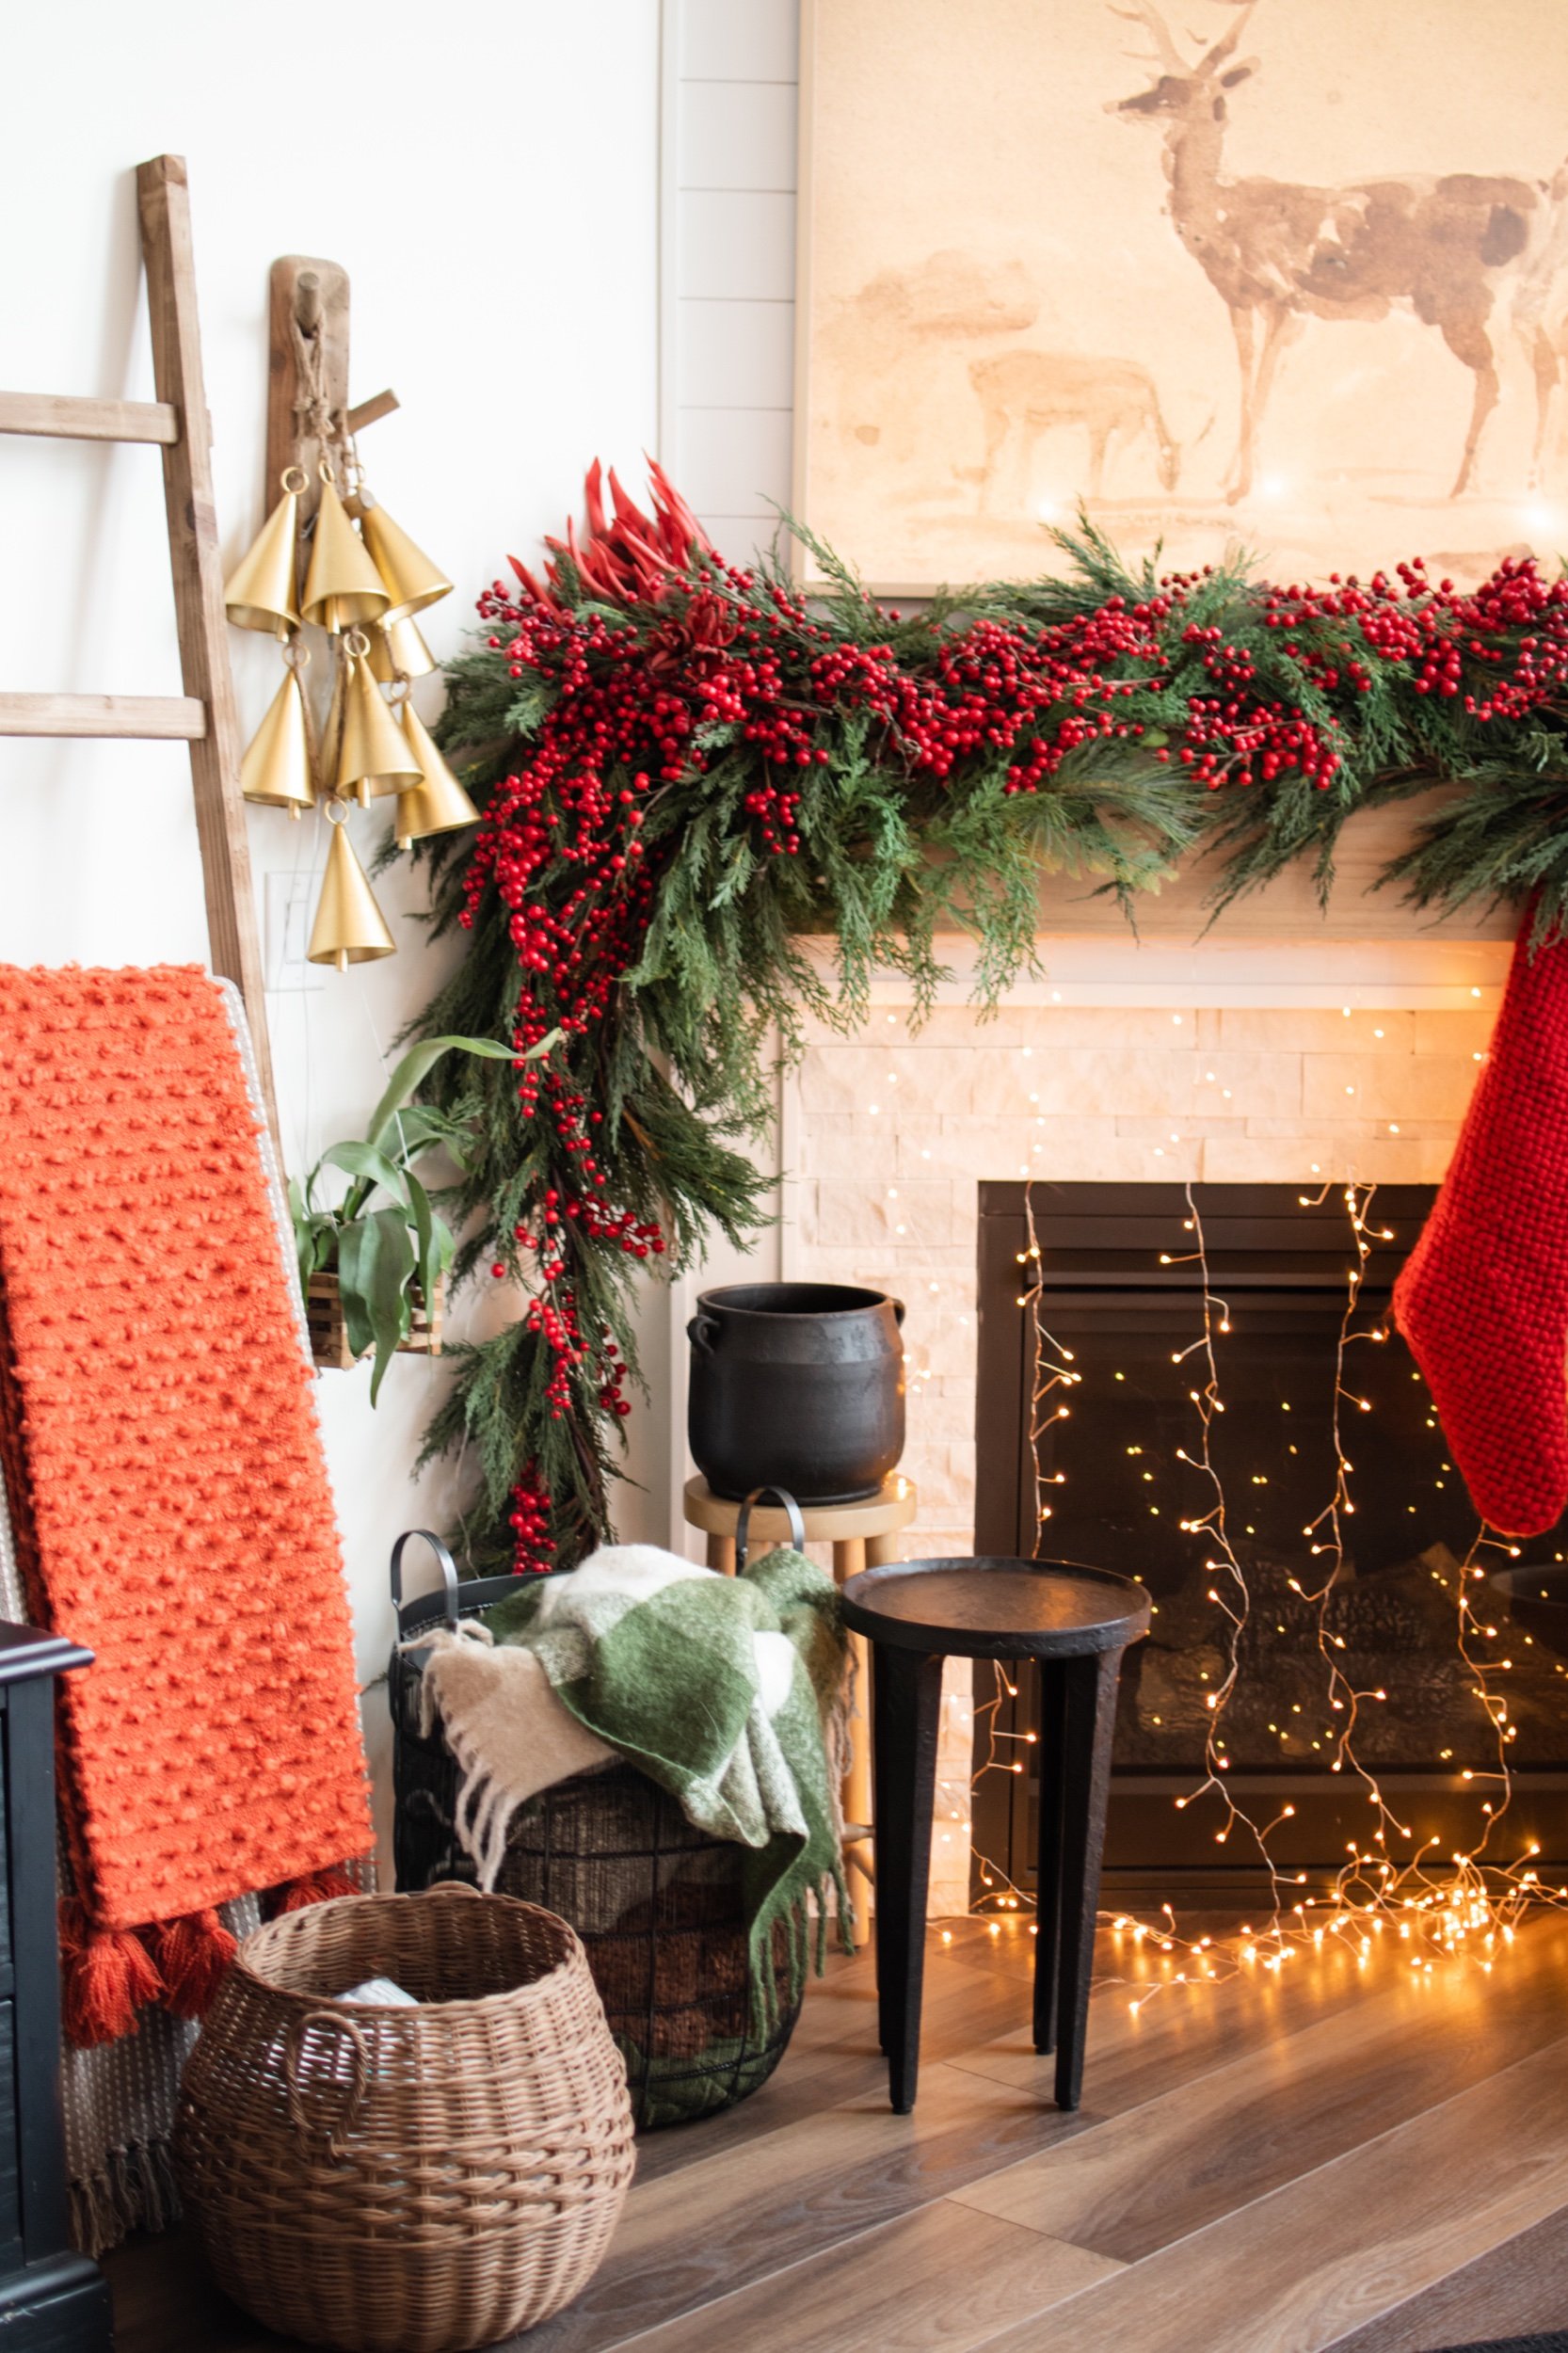
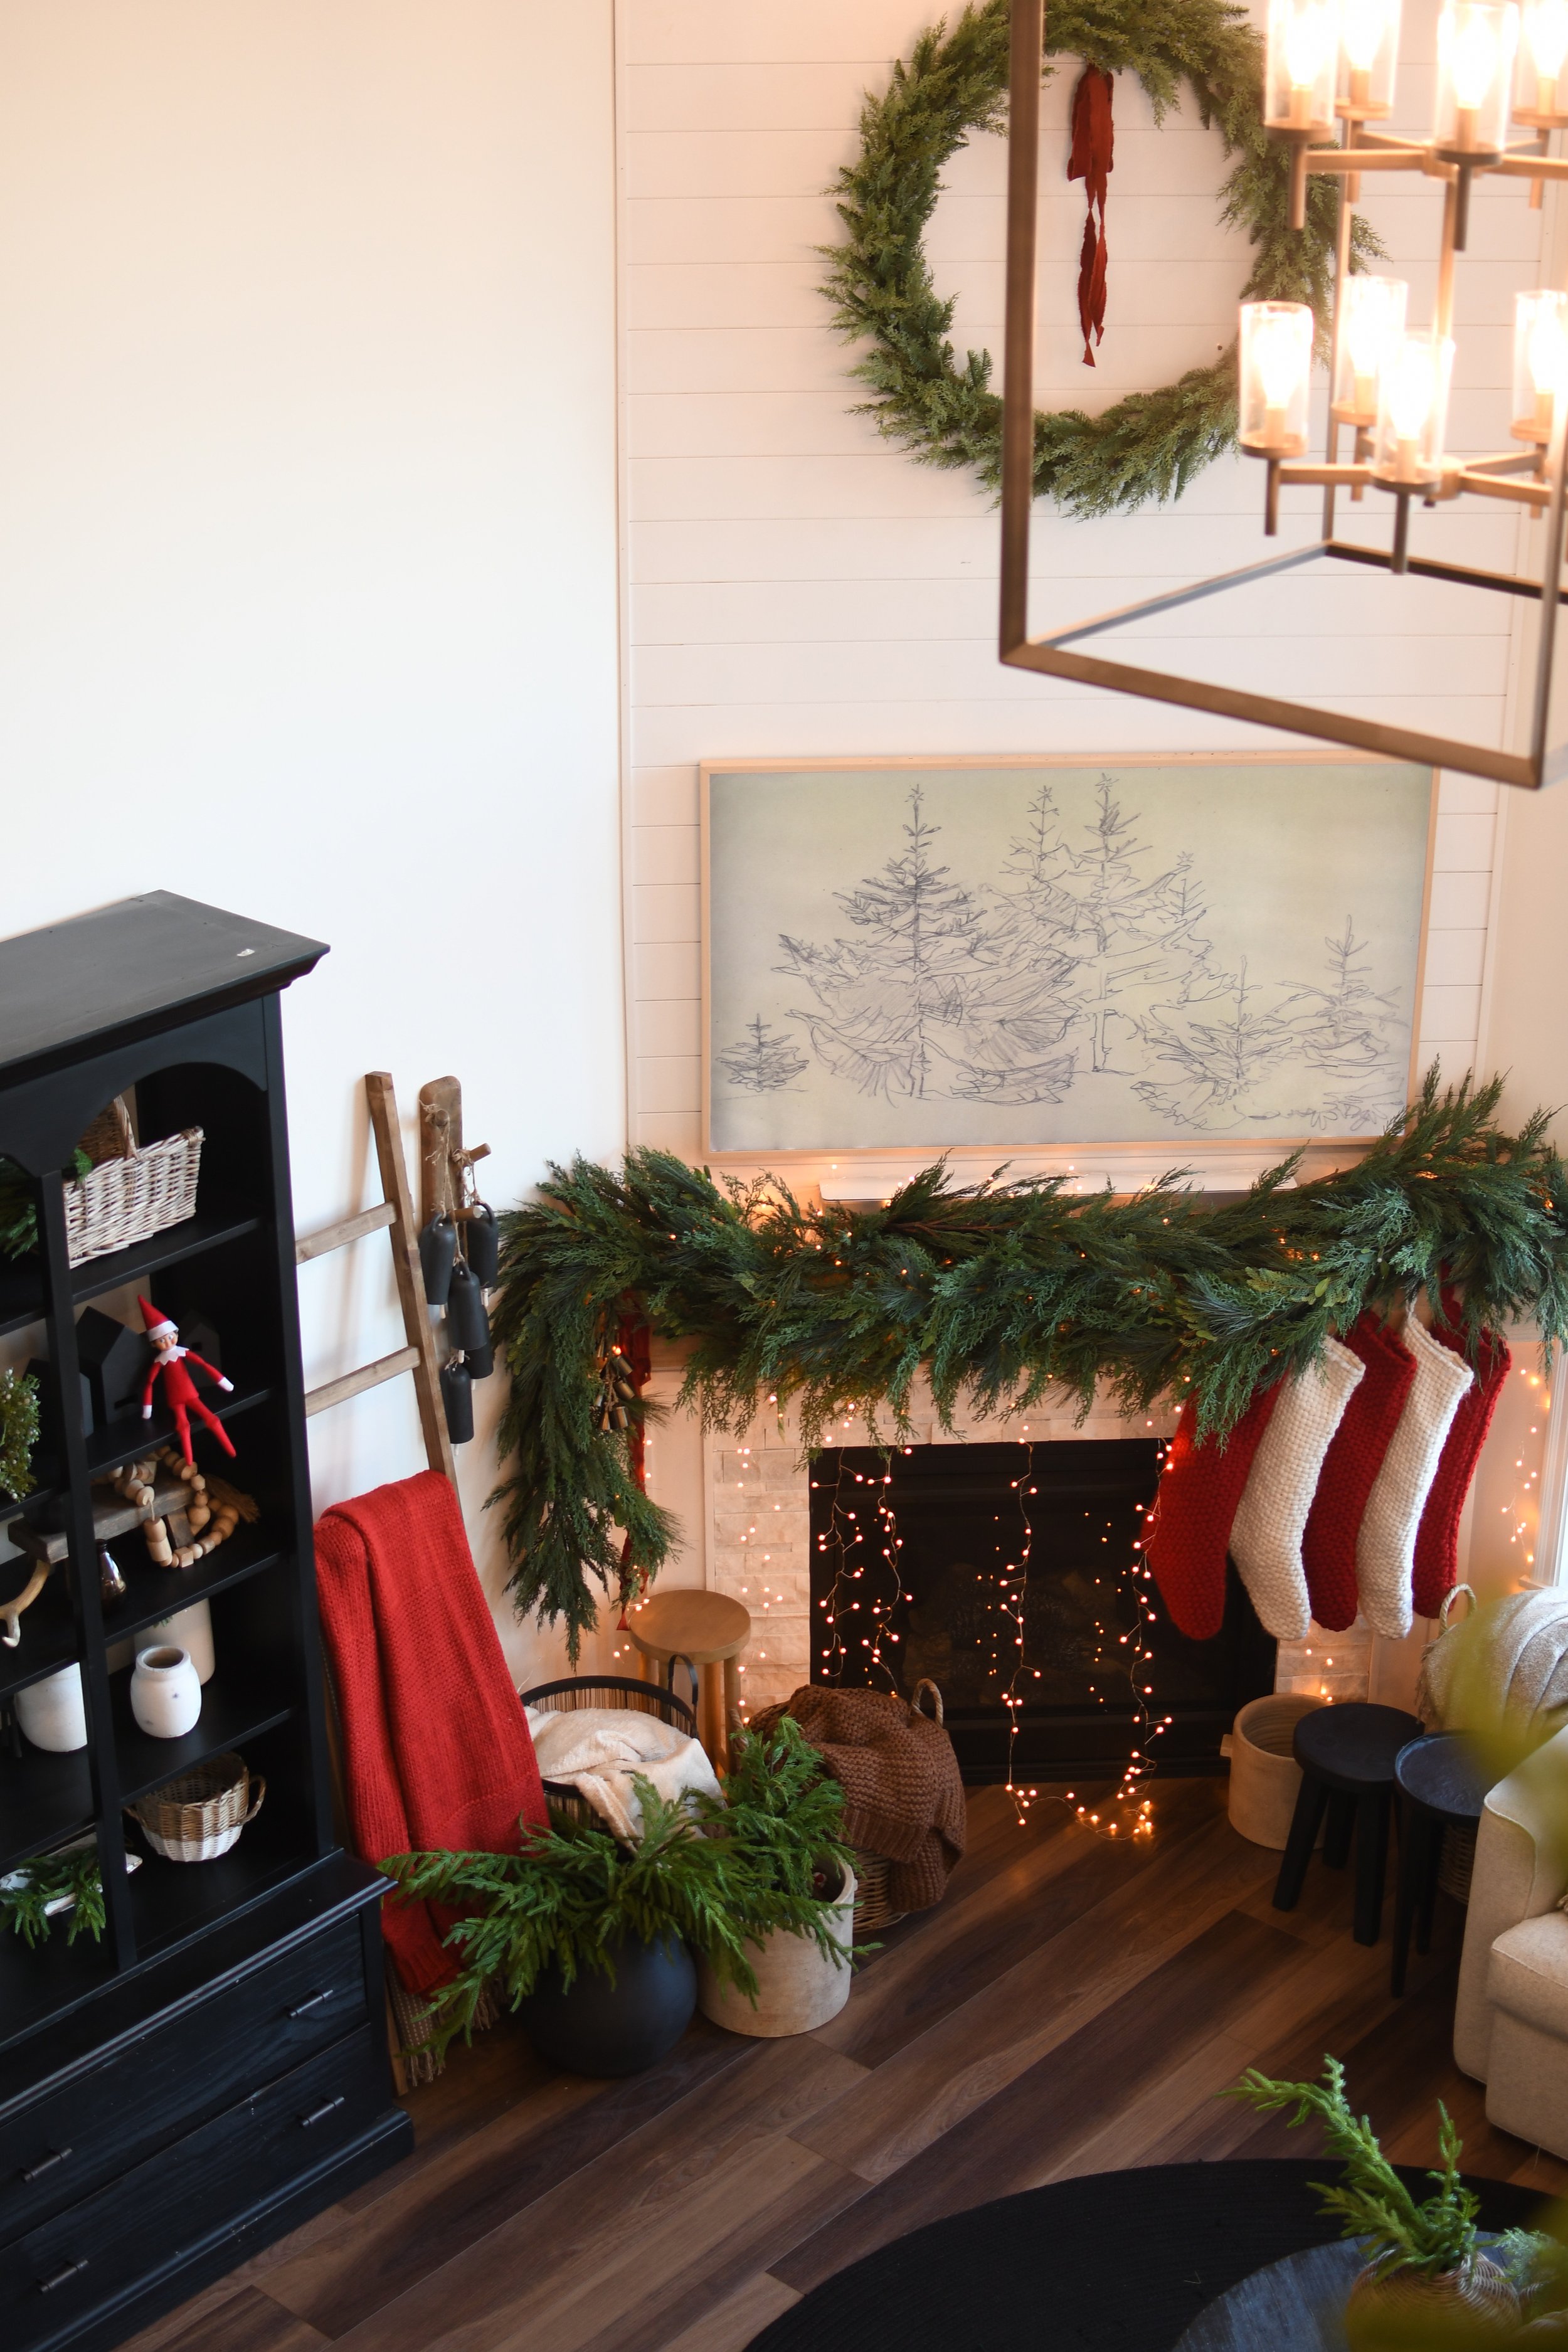
1- When you're finished using your fireplace for the season, dress it up for spring and summer with a wreath. Simply hang a wreath on your fireplace screen or from a ribbon below your mantel. Not only will your living space feel brighter for the warmer weather, but your home will also feel more alive with color and greenery. -Clover And Honey

2- Grapevine wreaths are everlasting and easy to dress up according to the season. In autumn, we recommend tucking in dried flowers and leaves from your garden. When winter comes, swap out the dried items with fresh evergreen boughs and a festive bow. Come spring, we love using bleached dried stems for something bright and airy. -Yarrow & Spruce

3- Consider your front door an extension of your home and add some personality to it. Hang an everyday or neutral wreath that shows off your personality and that you can switch out for seasonal designs. Not a lot of storage space? Utilize different bows on a neutral wreath to give a different look each season. -Welcomes To Adore

4- To use your wreath year-round, choose neutral colors or colors that match your home decor and change out textured ribbons or bows seasonally. Find beautiful dried botanicals from your local and American-grown flower farms. Adorn a mirror, hang two matching ones on old shutters framing a family photo, spice up a home office wall, or fill in that empty space above the mantle. Wreaths are an inviting decor element that can extend past the seasons. -Petals By The Shore

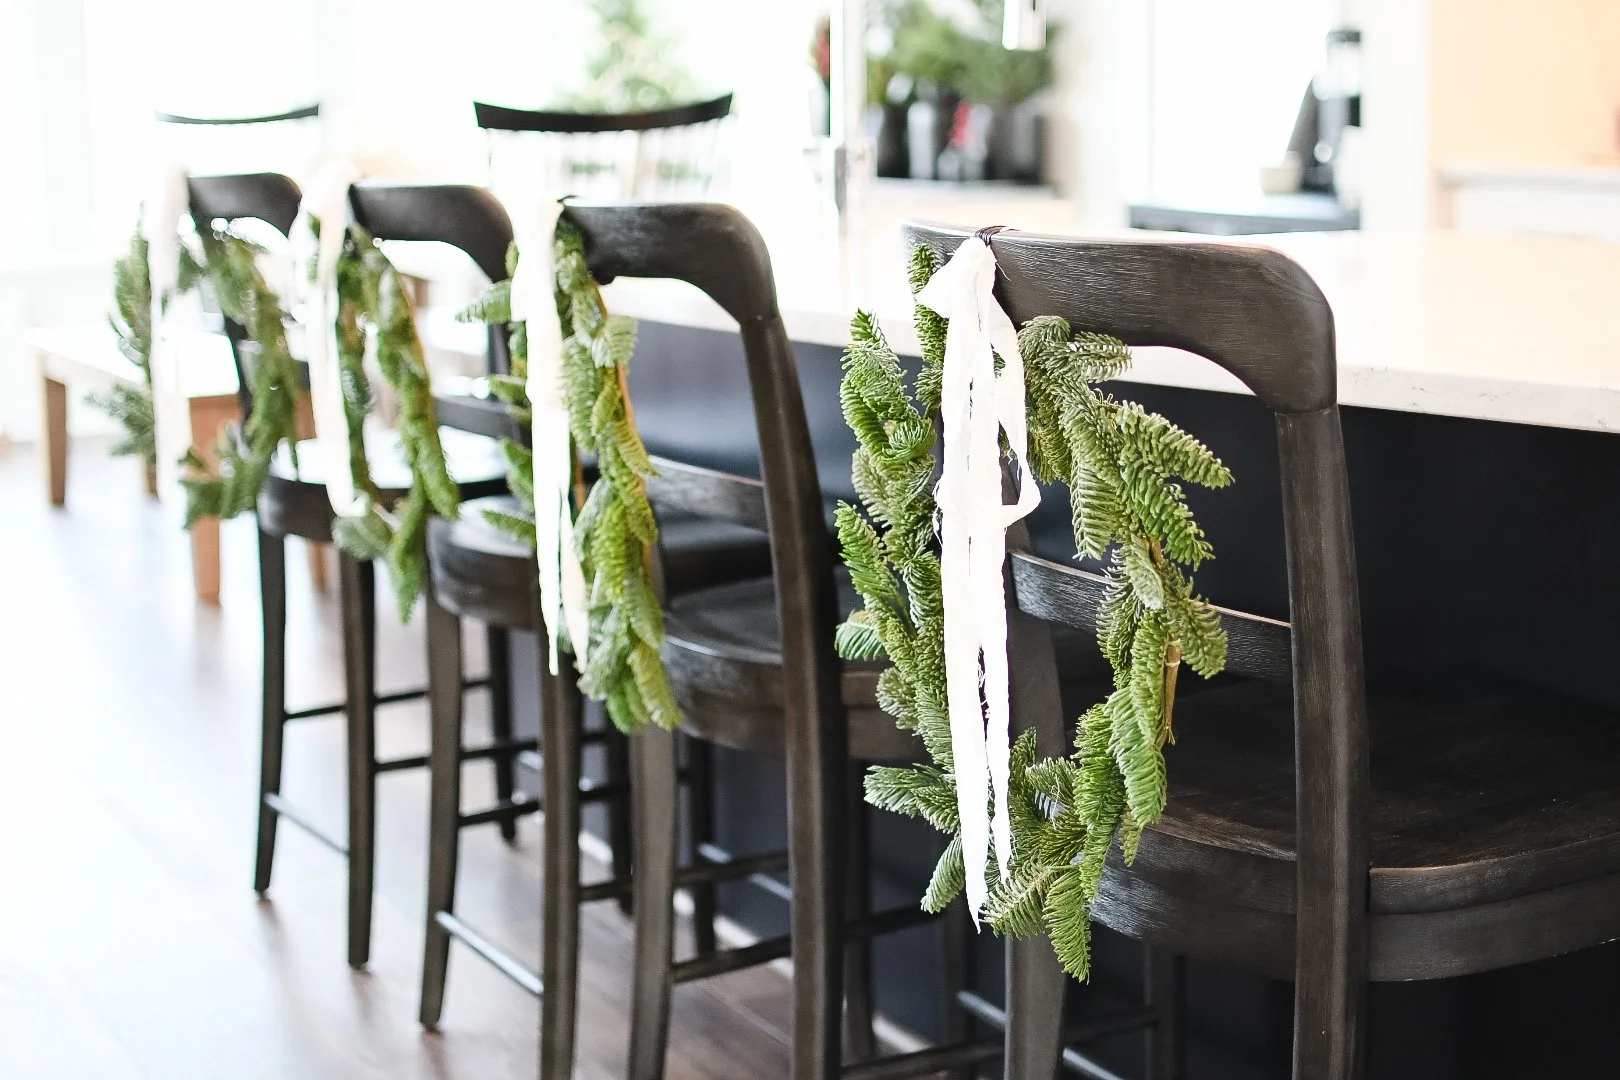
5- Add a unique detail to your holiday decor with a faux floral wreath. Hang a wreath with faux flowers to the back of each of your dining room chairs. Keep the wreath colors neutral and simply change the ribbon depending on the holiday or season. -Springbank Designs

6- Jazz up your staircase this Christmas with small artificial cedar wreaths to incorporate seasonal decor in a typically neglected area. For a touch of personality, use a ribbon to hang the wreaths along the length of your banister. The best part, it's affordable, and you can store the wreaths to use again next year. -All Things Amore

7- Wreaths are an easy and affordable way to add color and visual interest to your home.  There's always a wreath on our front door (and many interior doors too) year-round, and I switch them out with the holidays and seasonsAnother favorite way to use wreaths, especially during the holiday season, is to tie them to the backs of counter stools with a pretty ribbon. I also hang wreaths on top of mirrors with wall hooks — there's really no place a wreath can't go in your home if you have a vision for it. -First House On Finn

8- Dress up a plain space with a wreath by placing wreaths in different styles and sizes throughout your home for an instant cozy feel. Place them over mirrors, blanket ladders, kitchen cabinets, or tie them on the back of dining room chairs. -Pretty Rustic Wreath

9- Culinary herb wreaths make wonderful additions to any kitchen space. Bay leaf, rosemary, oregano, and thyme all work wonderfully to create a herb-themed wreath to hang from a cabinet door front and add a little spice to your kitchen decor. You can even use pieces of it in your cooking. -Foxgloves Flowers

10- Add dried oranges, apple slices, and cinnamon sticks to make your wreath smell deliciously fragrant and to reflect the ingredients you might be using in your seasonal recipes. Even if you wouldn't usually decorate the kitchen for Christmas, the wreath lends a festive feel to the spaceWe spend a lot of time in the kitchen over the festive period, making tasty treats and preparing warming meals, so I like to hang a wreath in an alcove in my kitchen. You could switch up the decorations on the wreath for other occasions too, such as using pretty eggs and blossoms for Easter. -My Thrifty Life By Cassie Fairy

11- Take a close look at your home's color palette and incorporate those tones into your wreath to give it a cohesive feel. Dried wreaths can add such textural depth to your home, and choosing natural hues will help them stand the test of time and be everlasting. -Heirloom Florals

12- Warm up any space with a neutral basket wreath. Simply loop twine or festive ribbon through the top of a tall and thin basket to create a hanging handle and layer your favorite faux or real florals to bring a mixture of cozy neutrals and seasonal florals to any wall. Frustrated that your wreath is fading after several sunny seasons? Lay your wreath in a well ventilated area, and spray it with an outdoor clear sealer spray to keep those colors brighter year after year. -Brush + Bloom Home

13- Incorporate natural elements in seasonal wreaths. Adding dried flowers or foraged natural materials to an evergreen wreath adds interest and makes your wreath one of a kind. Whether you prefer a monochromatic or bright mix, there's a wreath maker out there for you. Get yourself and your home something special and unique. -River Road Flowers

14- Instead of traditional harvest wreaths of red and orange foliage or holiday wreaths of evergreen and a blast of colors, you can create a more timeless and natural look by selecting a wreath that is lifelike with subtle autumn colors. Look for wreaths with browns and golds and decorated with botanical species that signify the holidays, such as pine cones or mistletoe. -Silk Flower Depot

15- Consider placing a wreath on your kitchen pantry door, on the vent hood above the stove, powder room door, resting on the fireplace mantle, or over a mirror. Wreaths are a perfect year-round home accent for more than just your front door. Choose a year-round wreath of simple greenery such as boxwood, lambs ear, or magnolia leaves. Then, accent seasonally with different bows or tucking in seasonal items such as flowers, ornaments, and family photos. -The Lone Starbarn

16- Split a larger floral arrangement into two smaller arrangements and place them both in the same room. Having multiple arrangements with the same flower styles will tie the room together in a subtle but intentional way, making the room look and feel balanced. You can also DIY your arrangements to help keep your home fresh, cozy, and festive for the holiday season. -Poppy Flowers

17- Design a garden-rich experience inside your minimalistic space and home by hanging a unique garden-style wreath with deep leafy foliage, and faux moss, succulent plants, and flowers to create a lush passageway experience down the main entrance of your home. This design idea can be a magical way to infuse your cozy master bathroom with a spa-like experience surrounded by green vines and plants. It's also an excellent choice to create a lavish green artificial wall at a festive garden party or special event. -Biosphere Dome Wreaths

18- DIYers looking for a quick wreath refresh should opt for a grapevine wreath. They are versatile in their styling, affordable, and easy to use and reuse. Check dollar stores for ribbon, seasonal decor, and signs to create the perfect grapevine wreath without breaking the bank. Whether used outdoors or in, wreaths are often the first thing a visitor notices, so it's important to choose something that adds to your existing style or design, not distracts from it.. -Southern Diva Interior Designs

19- Dress up inexpensive, mass-produced wreaths for a high-end look and to display your unique style. One of my favorite things is to add a new ribbon, florals, or greens to inexpensive wreaths or arrangements. While at the grocery, home store, or second-hand store, I am constantly hunting for my next piece to upgrade. -aDOORable Deco Decor

Originally published by Redfin


Rachael YoungComment
Holiday Front Porch Inspiration
Grid of front porch images

Everywhere you look, or everywhere you shop, rather, we’re seeing supply chain issues and shipping delays. The good stuff always sells out early, and that’s especially true this year, so it’s time to start planning out your holiday decor!

I’m here to tell you that you do not need to buy all new holiday decor each year, despite the temptation! I’m trying to reuse as much of last year’s decor as possible. Spend time thinking and purchasing only quality things that you love, and you’ll be more inclined to reuse those pieces year after year. I always try to plan ahead for future decor and how I can use the pieces again — Designing in this way won’t impact your wallet and storage space quite so much! A timely example here is thinking “winter” versus “Christmas.” Or this year, my vibe is “winter… plus red, lots of red.”

My main inspiration photo for this year was found on Anthropologie’s ribbon product listing of all places. That red ribbon is inspiring my whole winter home! Fun fact: I used to own a handmade dog collar business, so I know a lot about ribbon (of all things), and I’m all about splurging on quality ribbon! This Anthro ribbon has a bit of orange to it that plays nicely with our Christmas tree florals.


Linking some of my holiday front porch favorites for 2021 below:


CRATE & BARREL, $59+

MCGEE & CO, $45+

TARGET, $60


TARGET, $40+

POTTERY BARN, $49+

POTTERY BARN, $29+

 
Rachael YoungComment
BOO! Donut Edition 2021
Donut-BOO-2021-Mockup.jpg

Happy first day of October!! Since we moved to our neighborhood, I’ve enjoyed starting the “You’ve been BOO’ED” tradition and keeping it going each year. Halloween is my very favorite holiday! In previous years, I’ve filled a bucket with all sorts of random Halloween goodies, and secretly delivered it to a neighbor with the message to pass it on. Of course COVID changed things, and last year we tried a “donut BOO” for the first time. Drop off surprise donuts on your neighbor’s doorstep, DoorDash style, with a cute BOO note. Who doesn’t love surprise donuts?

2.png

To start the tradition in your neighborhood this October, download the free PDF below and print (note: it looks best printed US Letter Borderless). Get your favorite donuts, and drop them at a neighbor’s doorstep along with the two prints! It’s that easy to get in the Halloween spirit and totally make someone’s day. Here’s to October!

Tag me @firsthouseonfinn if you #DonutBOO this year!! I’d love to see!


Donut artwork under license. Do not reproduce without permission.

Home Office Plans

I recently started back full-time (from home) at my job as an interactive designer, and with that, comes a fun home office refresh!

We have a large sitting area in our master, which has served as Garret’s home office for the past three years. This location wasn’t working for either of us, so Garret just finished building himself a finished office in our basement, and now the master bedroom sitting area is turning into my home office.

I’m dreaming up a cozy area (since it’s in our master bedroom), while also creating a functional office space that I look forward to going to. I am in love with the Saguaro sectional from Anthropologie, so I’m definitely trying to work that into my design. I already have the white Lombok desk and gray Elowen desk chair, but I’m open to changing that out. So many options, I truly can’t decide! I’ve mocked up some ideas with different curtains + mirrors + couches. Indigo, black, neutral, blush — Which is your favorite? Can’t wait to show you what I’ve chosen!

Indigo2.jpg
Gray.jpg
LeatherGray.jpg
 

Shop the Post

 
Spring Project: Exterior Lighting
exterior-lighting.jpg

As the snow melts, you may be looking at the exterior of your home, thinking it looks a little drab. Winter sure can do that. But fear not, spring is coming, and I’ve got a project for you! One of the easiest, most affordable ways to up your curb appeal this spring: exterior lighting. This is one of those projects that makes a huge impact, and it isn’t a huge expense (in time or money). Ditch those boring builder-grade lights and freshen up your exterior with me this spring!

I’m linking all my favorite affordable lights for you, including the ones I have on my own house. Starting off with floodlights — did you know you could change those ugly things? We changed all of our floodlights out for less than $130!


LOWES, $42

POTTERY BARN, $229

LAMPS PLUS, $69

BELLACOR, $119

LOWES, $129

BELLACOR, $229

SIGNATURE HW, $138

LOWES, $36

LOWES, $39

LAMPS PLUS, $79

BUILD.COM, $49

BUILD.COM, $98

BALLARD DESIGNS, $99

BUILD.COM, $85

 
Rachael YoungComment
IKEA Billy Built-ins: Front Room Reveal
FrontOffice-new copy.jpg

We began our front room project nearly a year ago as part of the spring 2020 One Room Challenge. At the time I was pregnant, and we figured it was a relatively easy 8-week project that we’d have finished before the baby was born. Spoiler alert: It took a lot longer than we anticipated, and once baby Celia was here, we didn’t have time for any home projects at all! So the front room sat unfinished for the better part of the year, and we only made it to week 2 and week 3 of the One Room Challenge. However, not finishing the ORC didn’t stop us from finishing the room! We took our time getting it just right, and it turned out better than we had even hoped.

I have a full post on my goals for the room and our plans to do it, but I’ll do a quick recap here. Our main goal was to turn this room into usable square footage. The room was previously a work space for my dog collar business, and I no longer make dog collars. The room was also not my style; I had designed it as a budget version of a Studio McGee office. I don’t even like the color blue, and the walls were navy! It didn’t flow with the rest of my home. I have since found my own style, and the new design reflects this.

We planned to keep the desk, add DIY built-ins for storage, and add more seating, which would make this a flexible room the whole family can use. I designed the built-ins with arches to play off of the arched cabinet from Magnolia we have in our great room. To start the project, I created a design mock-up in photoshop to show my vision, and then Garret got to work building it!

Project List:

• Custom built-ins made from IKEA Billy bookcases
• Repeat the box moulding above chair rail on left/right walls
• Paint the whole room Cinnamon Sugar by Magnolia
• Spray paint chandelier black
• Source new chairs and styling elements


After

FrontOffice-new copy.jpg

Design Mockup

FrontOffice-mockup.jpg

Before

FrontOffice-old.jpg

Can you believe those built-ins are IKEA bookcases?!

You’d never know it without me telling you. Garret did such an amazing job making them look like custom built-ins, which would have cost a fortune. So let’s dive into how he transformed these IKEA Billy bookcases.

Step One: Demo

First, we took off all of the moulding, crown, and baseboard from the wall that would get the built-ins.  We had to be extra careful with the crown moulding because we wanted to reuse it and not have to find a replacement piece. This trim puller allowed us to take the crown off without any damage.

Step Two: Building the Bookcases

We assembled one bookcase to test fit our spacing. We had to figure out how many Billy bookcases and how many height extensions we would need for our space. For our 9 foot ceilings, we needed 2 height extensions per bookcase, so a total of four Billy bookcases, and eight height extensions. It took a day just to put all of these together! Garret also made an arch out of cardboard to show me what the arches would look like.

To keep the spacing exactly the same in between bookcases, Garret used 2x4’s cut to the same size on a mitre saw. He used white trim screws to secure the bookcases to each 2x4 block in the existing spot for the shelf inserts for the bookcase. This hid the screw completely.

Step Three: Creating the Arches

For the front face and arches, Garret used 1/2 inch MDF because it was so cheap ($20/sheet). Looking back, he wishes he used a product that was easier to work with, like plywood, although it is double the price. The MDF tended to tear out instead of cut cleanly.  

To make the arches, he laid out the spacing on a sheet of MDF and cut two circles out using a router and a circle jig. Once the two holes were cut, he cut the MDF down the center to get a total of four arches. Garret nailed the arches to the bookcases, reattached the crown moulding at the top, and then applied filler and sanded to make everything smooth.

Step Four: Wainscoting

Our house came with chair rail and box moulding in the front room, and I wanted to continue the box moulding on top of the chair rail to add interest to the walls without the built-ins. For the new moulding boxes, we wanted to match the bottom moulding exactly. We figured our local home builder would’ve used something from Lowes or Home Depot, but that wasn’t the case. Luckily, we were able to find our exact match online. The moulding was fairly inexpensive, at $3.78 per 8ft piece, but shipping cost us $170! In the end, it was around $250 for new trim that exactly matched our existing trim. This was definitely an unexpected expense!

Garret measured and made the cuts in our trim pieces, and I glued them together into boxes. He then nailed them to the wall, and we were ready for paint!

Step Five: Paint

I chose the color Cinnamon Sugar by Magnolia, and decided to try a full monochrome look for the first time. We painted the walls, trim, baseboards, - everything but the ceiling - in Cinnamon Sugar. This really made the IKEA bookcases look like they were true built-ins! We did some sanding on the bookcases before we painted, and a coat of B-I-N primer as well. Magnolia paint is great to work with; we had no issues with it adhering to the bookcases, and that was a big worry of mine. We also spray painted the old chandelier black, so it better matched the room.

IMG_4224 (1).jpeg
IMG_3572.jpg
IMG_4223.jpeg

Step Six: Styling

This is definitely my favorite part of any project! I purchased new chairs from target, my dream rug, and lots of new decor to fill the new shelves — the final step in making these built-ins officially part of our home.

DSC_1073.jpg
DSC_1002.jpg
DSC_1003.jpg
DSC_0783.jpg

Final Thoughts

It was really awesome to see this room come to life from a photoshop mockup. It took a lot more time and work than we ever anticipated, but the end result is just what I was hoping for. I hope this project inspires you to try something out of your comfort zone this year!


Shop the Post

Rachael Young Comments
Budget Kids Bathroom Reno

We did three big home projects in 2020: the backyard, the kids’ bathroom, and our front room. Today, nearly a year later, I’m finally revealing the kids’ bathroom project! I have such a hard time sitting down to write things out before we move onto the next project. Nevertheless, we finally had a sunny day and took photos of our finished project so that I could make this post!

This was a budget makeover for a builder-grade bathroom — everything was cosmetic, nothing structural — and we did it all ourselves! I was inspired by @jaci.daily on instagram for this one. I saw her mirrors and hexagon tile, and knew it was exactly what I wanted for our kids bathroom facelift. Since it is such a small space, I could really focus in on the details and use hexagons as a subtle theme throughout.

Before

before.jpg

After

after.jpg

For this budget bathroom update, we started with painting the cabinets Sherwin Williams Tricorn Black, and the walls Sherwin Williams Pure White. We did this project on such a whim that I didn’t even take a photo before we removed the old mirror and faucets!

This was a project of many firsts. Our first tile project, first flooring install, and first bit of plumbing for Garret. We used Calacatta Oro Hexagon Mosaic tile on the back wall, with a dark charcoal grout. Garret installed the new vinyl planks over our existing vinyl. The matte black faucets are super affordable, from Lowe’s.

IMG_9951.jpg
IMG_2542.jpg
IMG_0660.jpg

My favorite part of this bathroom is the wood hexagon accent wall. I had this idea in my head, made it with tape on the wall, and Garret brought it to life. He made a template and cut strips of pine to make the wood hexagons. Then he nailed them to the wall with a pin nailer, then spray painted everything Pure White. He’s amazing!

I just love all the details in this bathroom. We replaced the “boob light” with a gorgeous flush mount from PB Teen. I used the Hex cabinet hardware from CB2 on all the cabinets. I ordered a large hexagon mirror from Target online. I found hexagon stools for the kids at HomeGoods and spray painted them black. Everything just pulled together so nicely!

DSC_0869.jpg
DSC_0840.jpg
DSC_0898-Edit.jpg
DSC_0865.jpg
DSC_0834-Edit-2.jpg
DSC_0845.jpg

So there you have it! Our kids’ bathroom renovation is complete. I hope this inspires you to DIY something in your home this year! I’ll link everything I can in LTK below.

Best Faux Greenery for the Holidays

I’m decorating for Christmas early this year, because it has been a year. The festive lights and pops of red bring a coziness to my house that I am just so ready to enjoy. I am the queen of faux foliage, and I like to go all out at Christmas! I drape garland on the mantle, on top of the cabinets, along tables… basically anywhere I can put a command hook, you’ll find a Christmas garland.

I’m very particular about things, and when I find something I like, I am dying to share it with you! So I must give a special shout out to the Crate & Barrel cypress line of faux greenery, as it is THE best I’ve ever seen. It’s pricy, but worth the cost, because it looks so real and will last you for years to come. I had one of the Crate & Barrel cypress trees outside on the front porch all winter last year, and it’s still in perfect shape to set out again this year. It’s a great base for your holiday decor, as you can leave it plain or dress it up as you like. I just keep adding to my cypress collection! (The garland is currently sold out, but keep an eye out, because I was able to snag one in store this year.)


CYPRESS TREE

BY CRATE & BARREL

CYPRESS WREATH

BY CRATE & BARREL

CYPRESS GARLAND

BY CRATE & BARREL [SOLD OUT]


If cypress isn’t your thing, I’ve rounded up eleven more faux greenery options for your holiday decor. I love to start with a simple greenery base and add to it as I go, so I tried to find as many “plain” options as I could. This way, you can reuse your faux greenery year after year, but change it up by adding different ribbons, bells, floral picks, etc. You can mix and match your greenery, too — not everything has to be from the same family! Adding eucalyptus into other greenery, for example, is very on trend this year.

As always, I tried to include many different price points in my recommendations, so hopefully you find something you love! You can shop the post at the very bottom (I always appreciate you shopping my posts!). Let the holiday decorating begin!!

Faux-Greenery.jpg
Rachael YoungComment