DIY Starbucks Halloween Costumes

Halloween is my favorite holiday! It’s just plain fun. Garret and I have the tradition of making our Halloween costumes every year, and this year, we were a Starbucks family! The girls were Starbucks Frappuccinos, and the guys were baristas. It turned out SO cute!! I’ll walk you through the DIY and everything you need below. With about an hour and a lot of hot glue, you can even make these Starbucks costumes last-minute on Halloween!


The supply list:

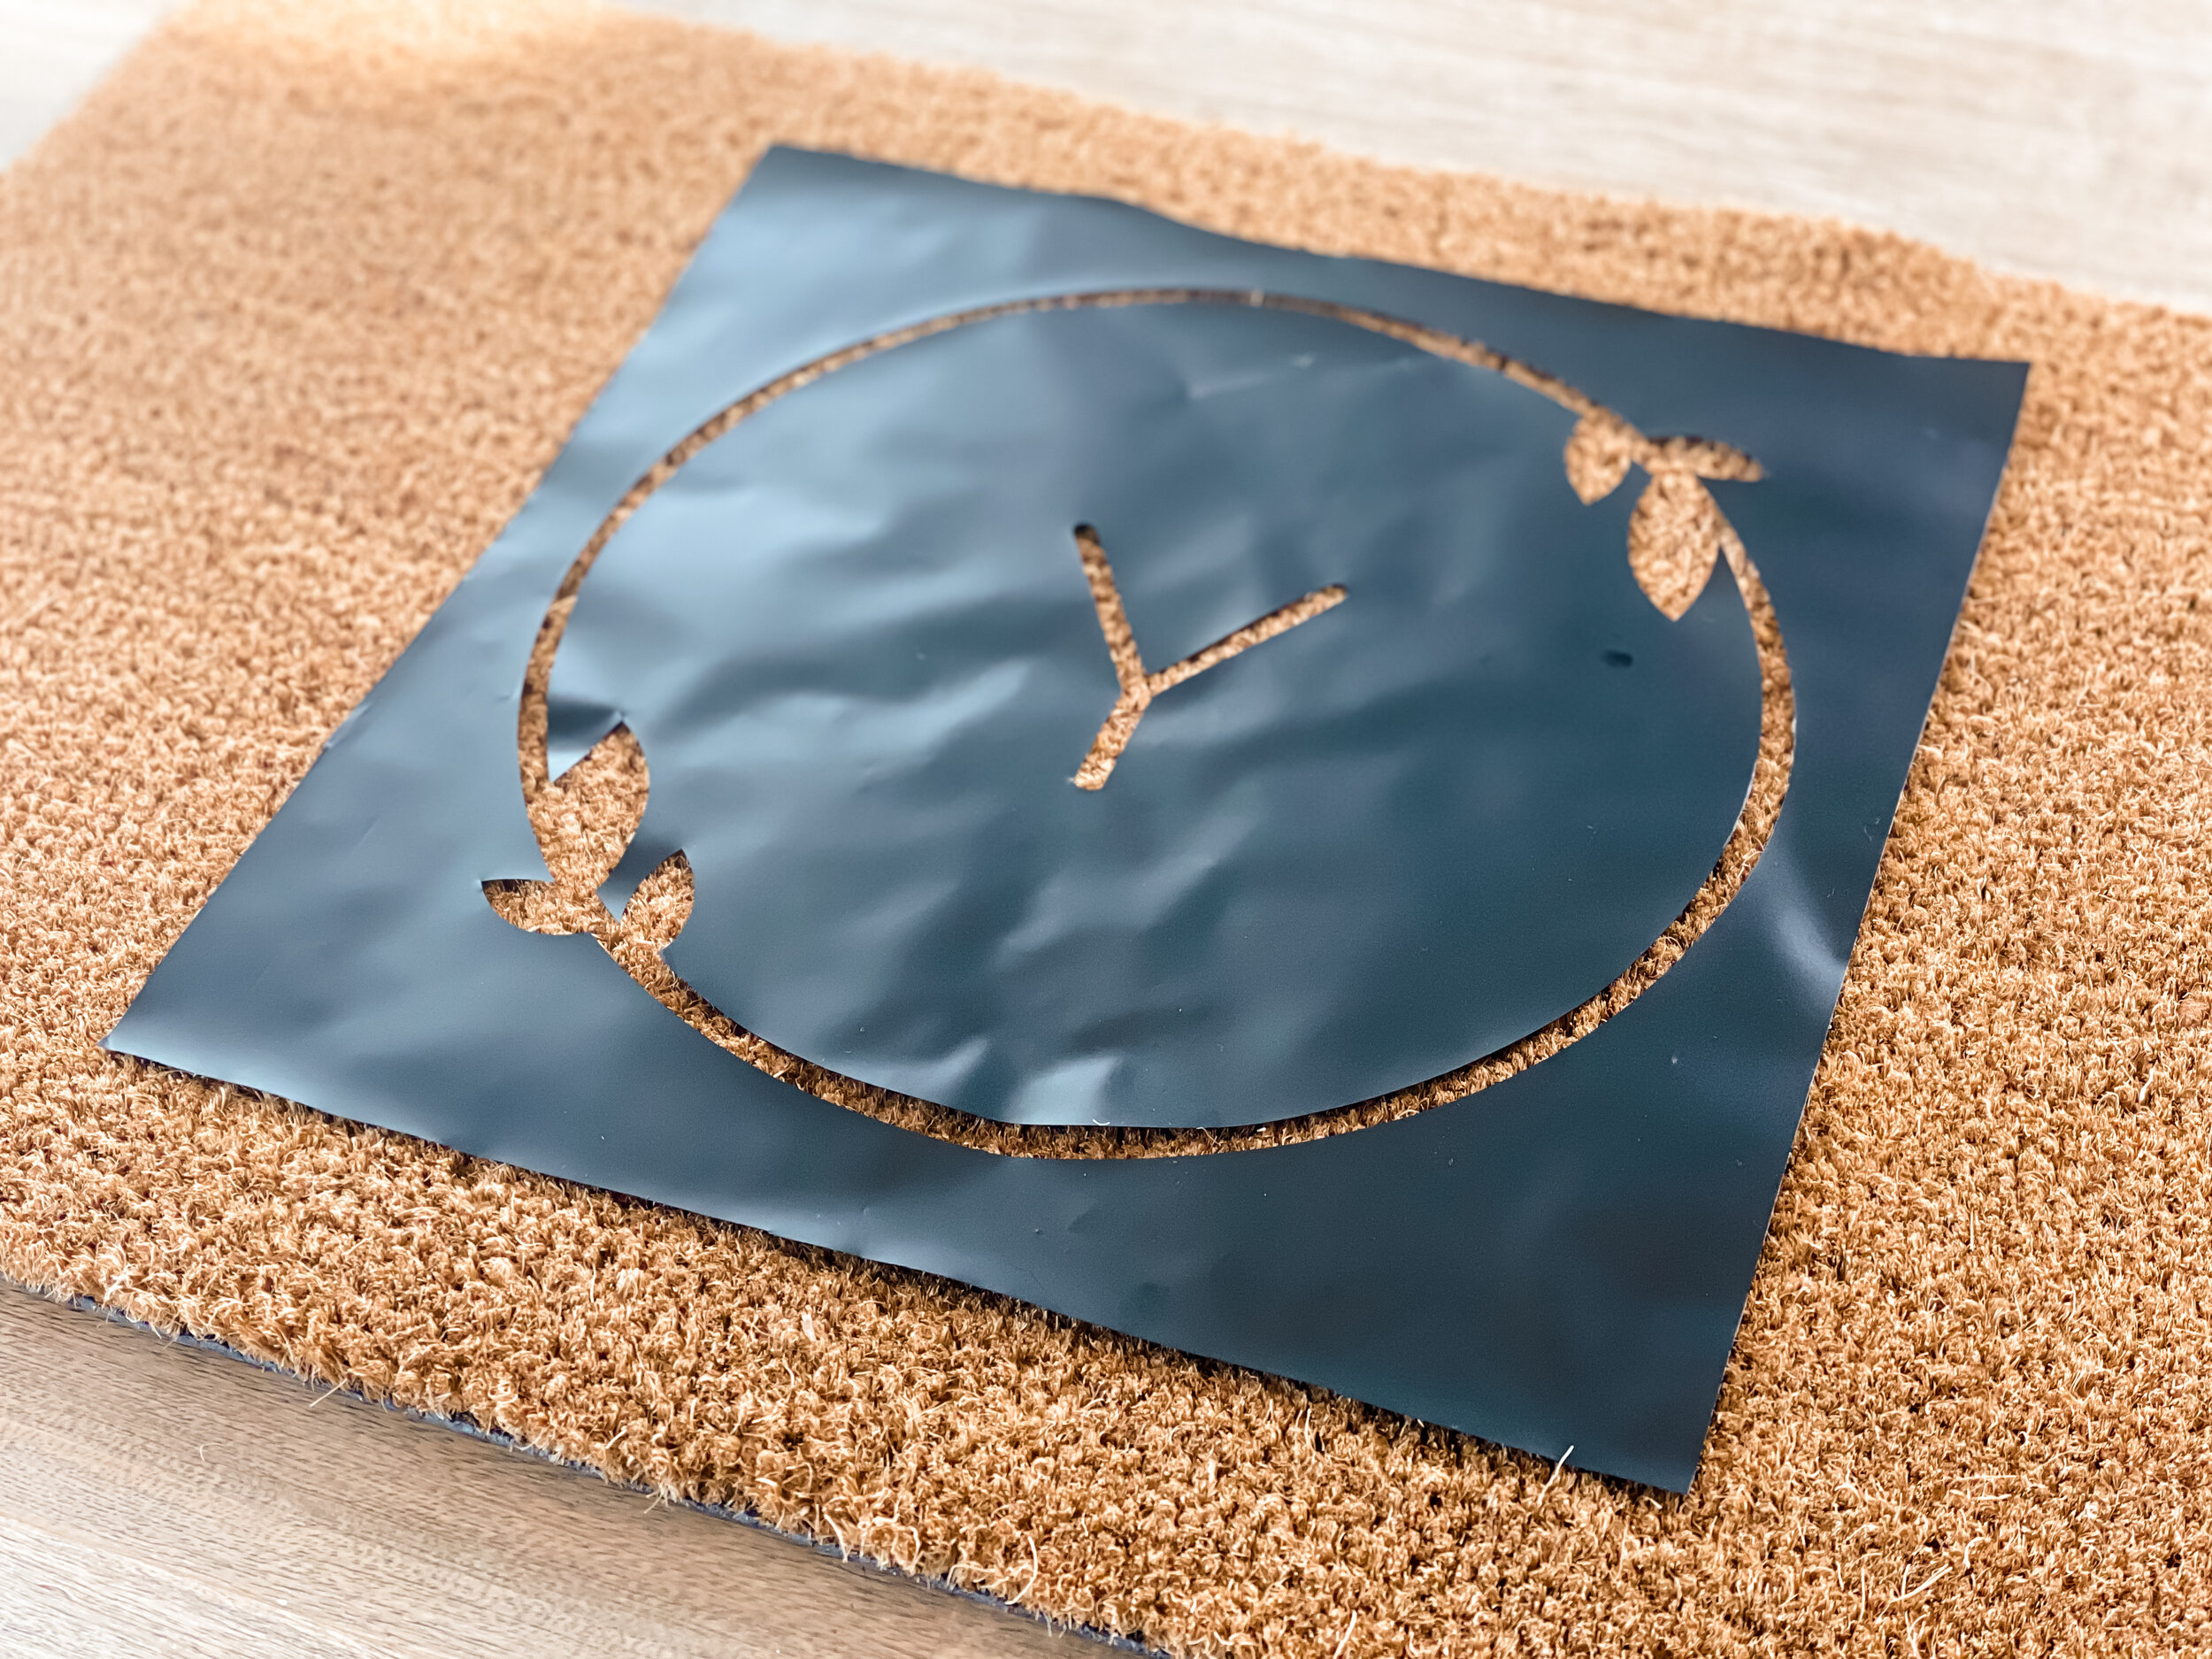
Note: We have a Silhouette Cameo machine and we used this to cut out the Starbucks logos. You can also do this with scissors or X-acto and patience!

Kids’ green apron
Kids’ plain black hat
Kids’ neutral shirt and pants
Tutu
Headband
Straw
Green vinyl
Green iron-on
White iron-on
White felt
Tulle
Iron
Hot glue gun
Sewing machine (optional)

starbucks-baby-costume.jpg
starbucks-costumes-kids.jpg

To make the Starbucks Barista costume:

  1. Cut the Starbucks text logo in white iron-on.

  2. Cut the circular Starbucks logo in green and white iron-on.

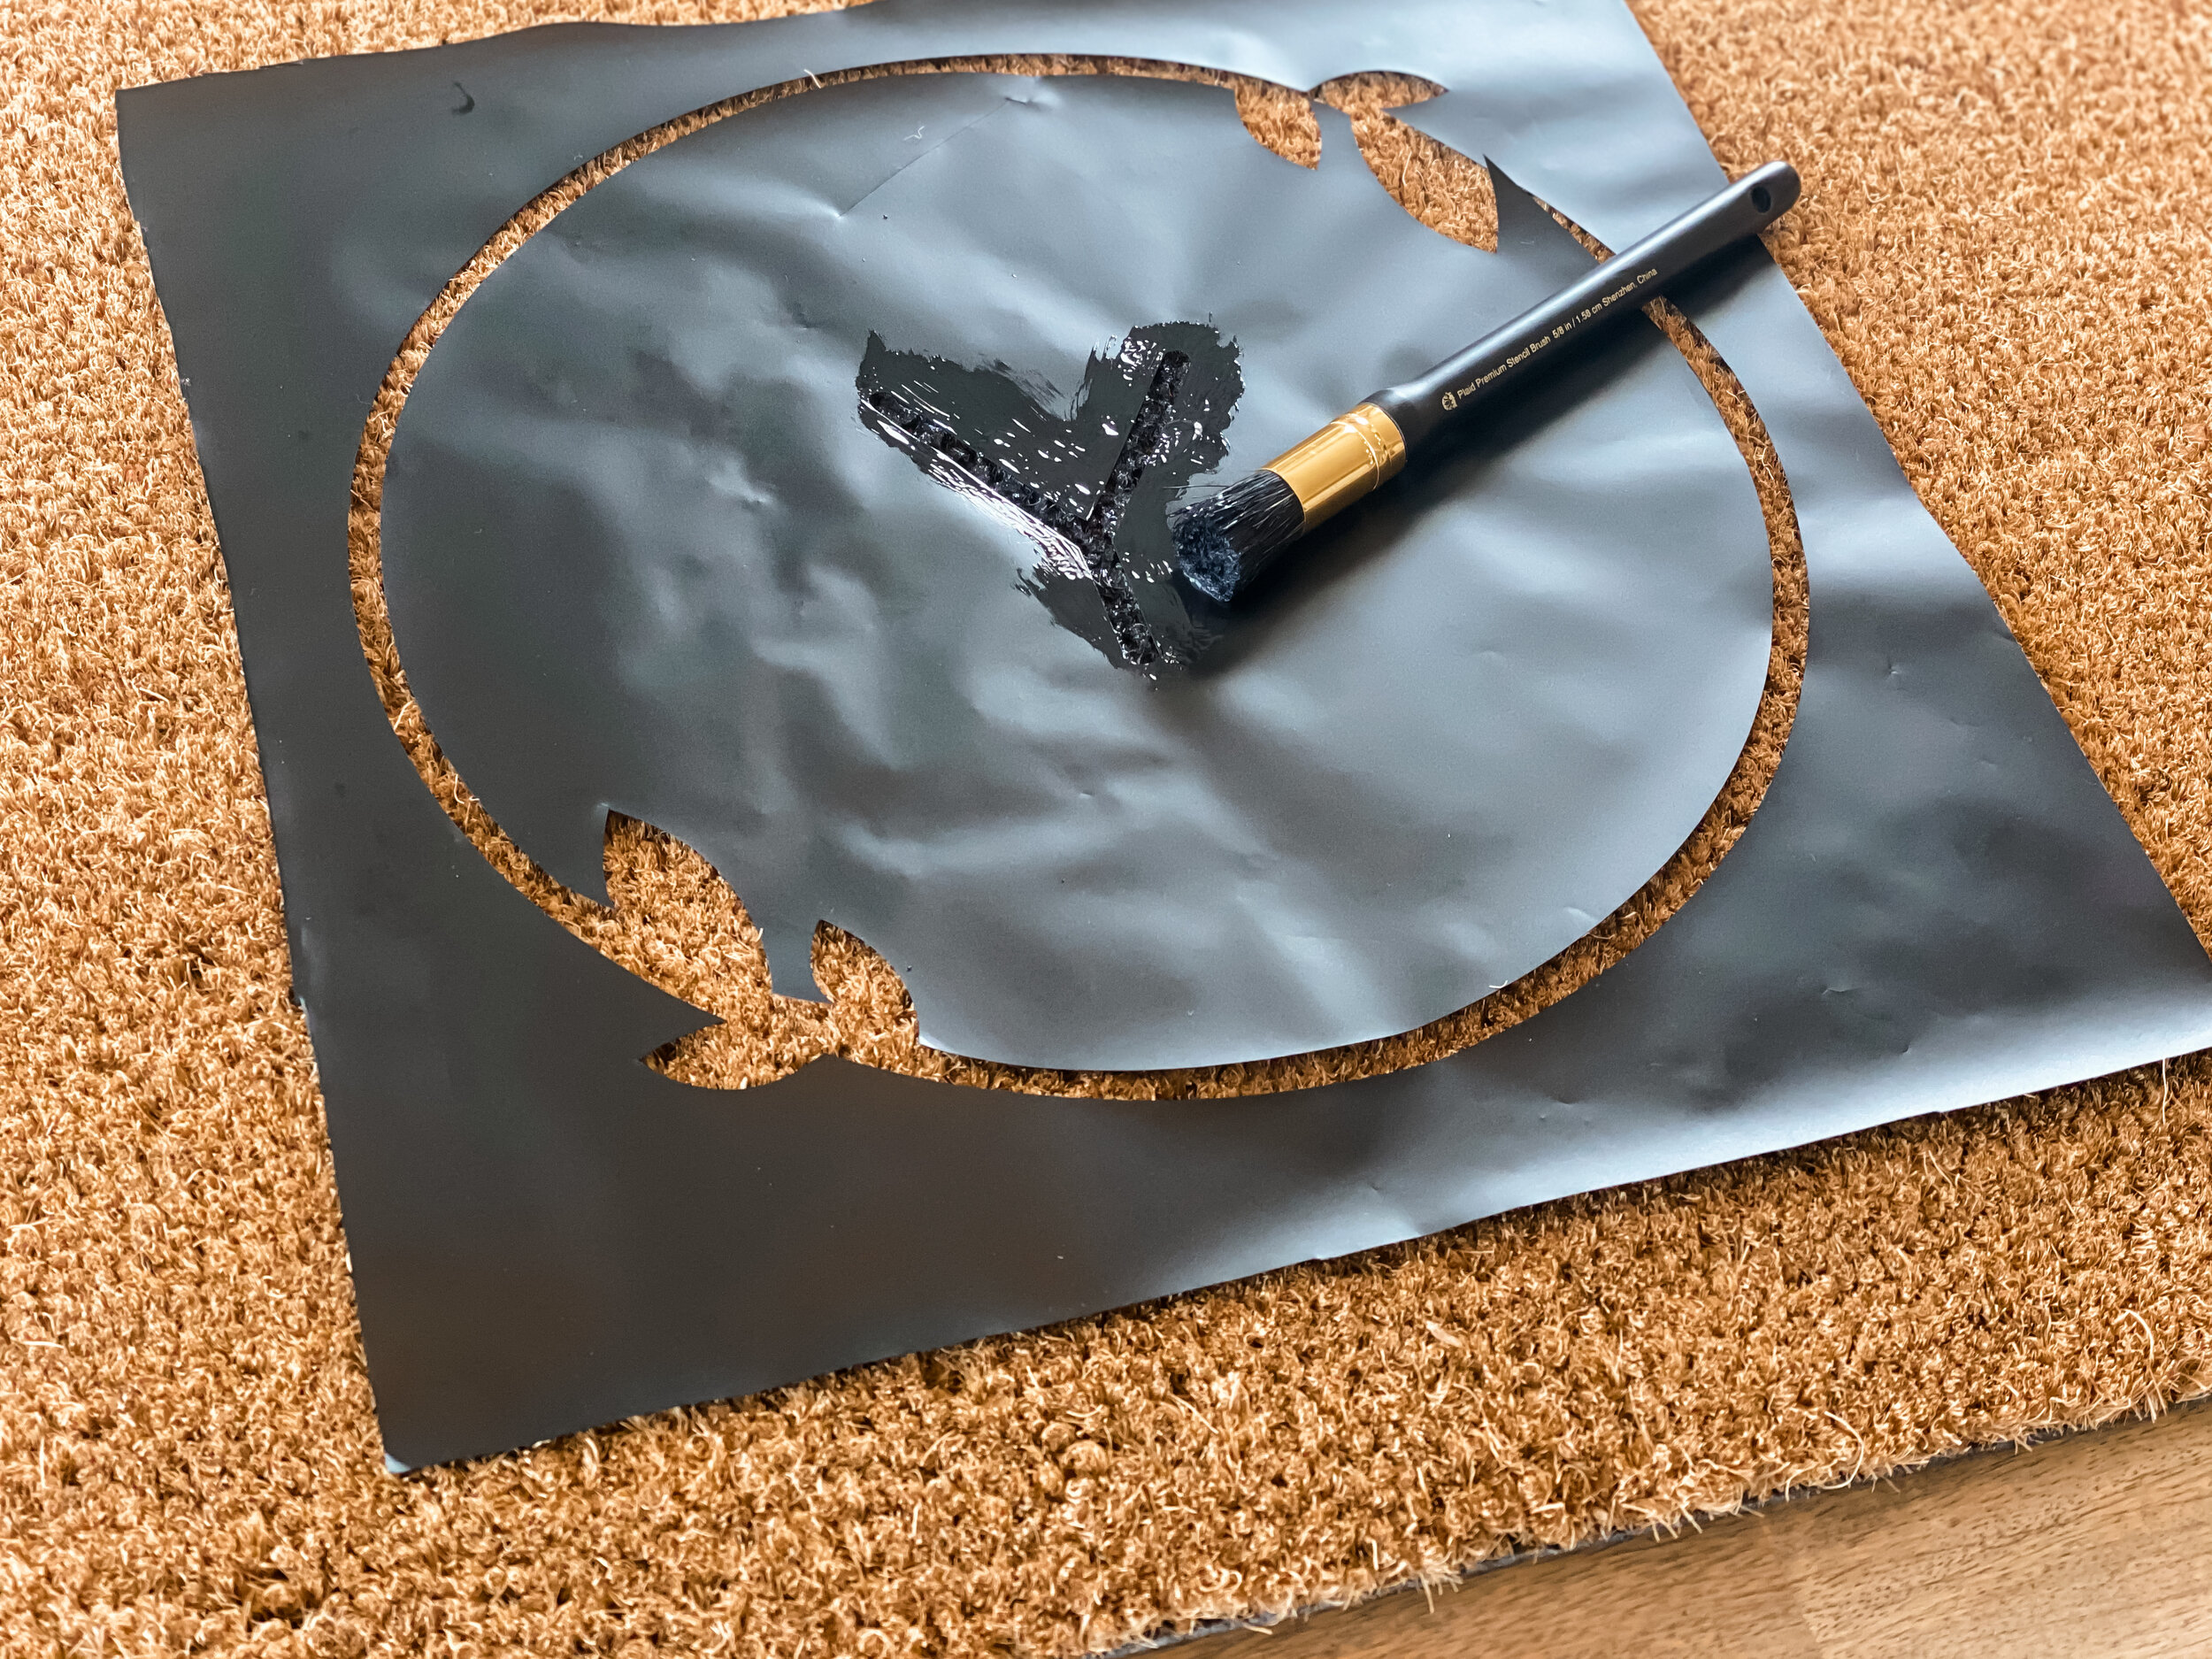
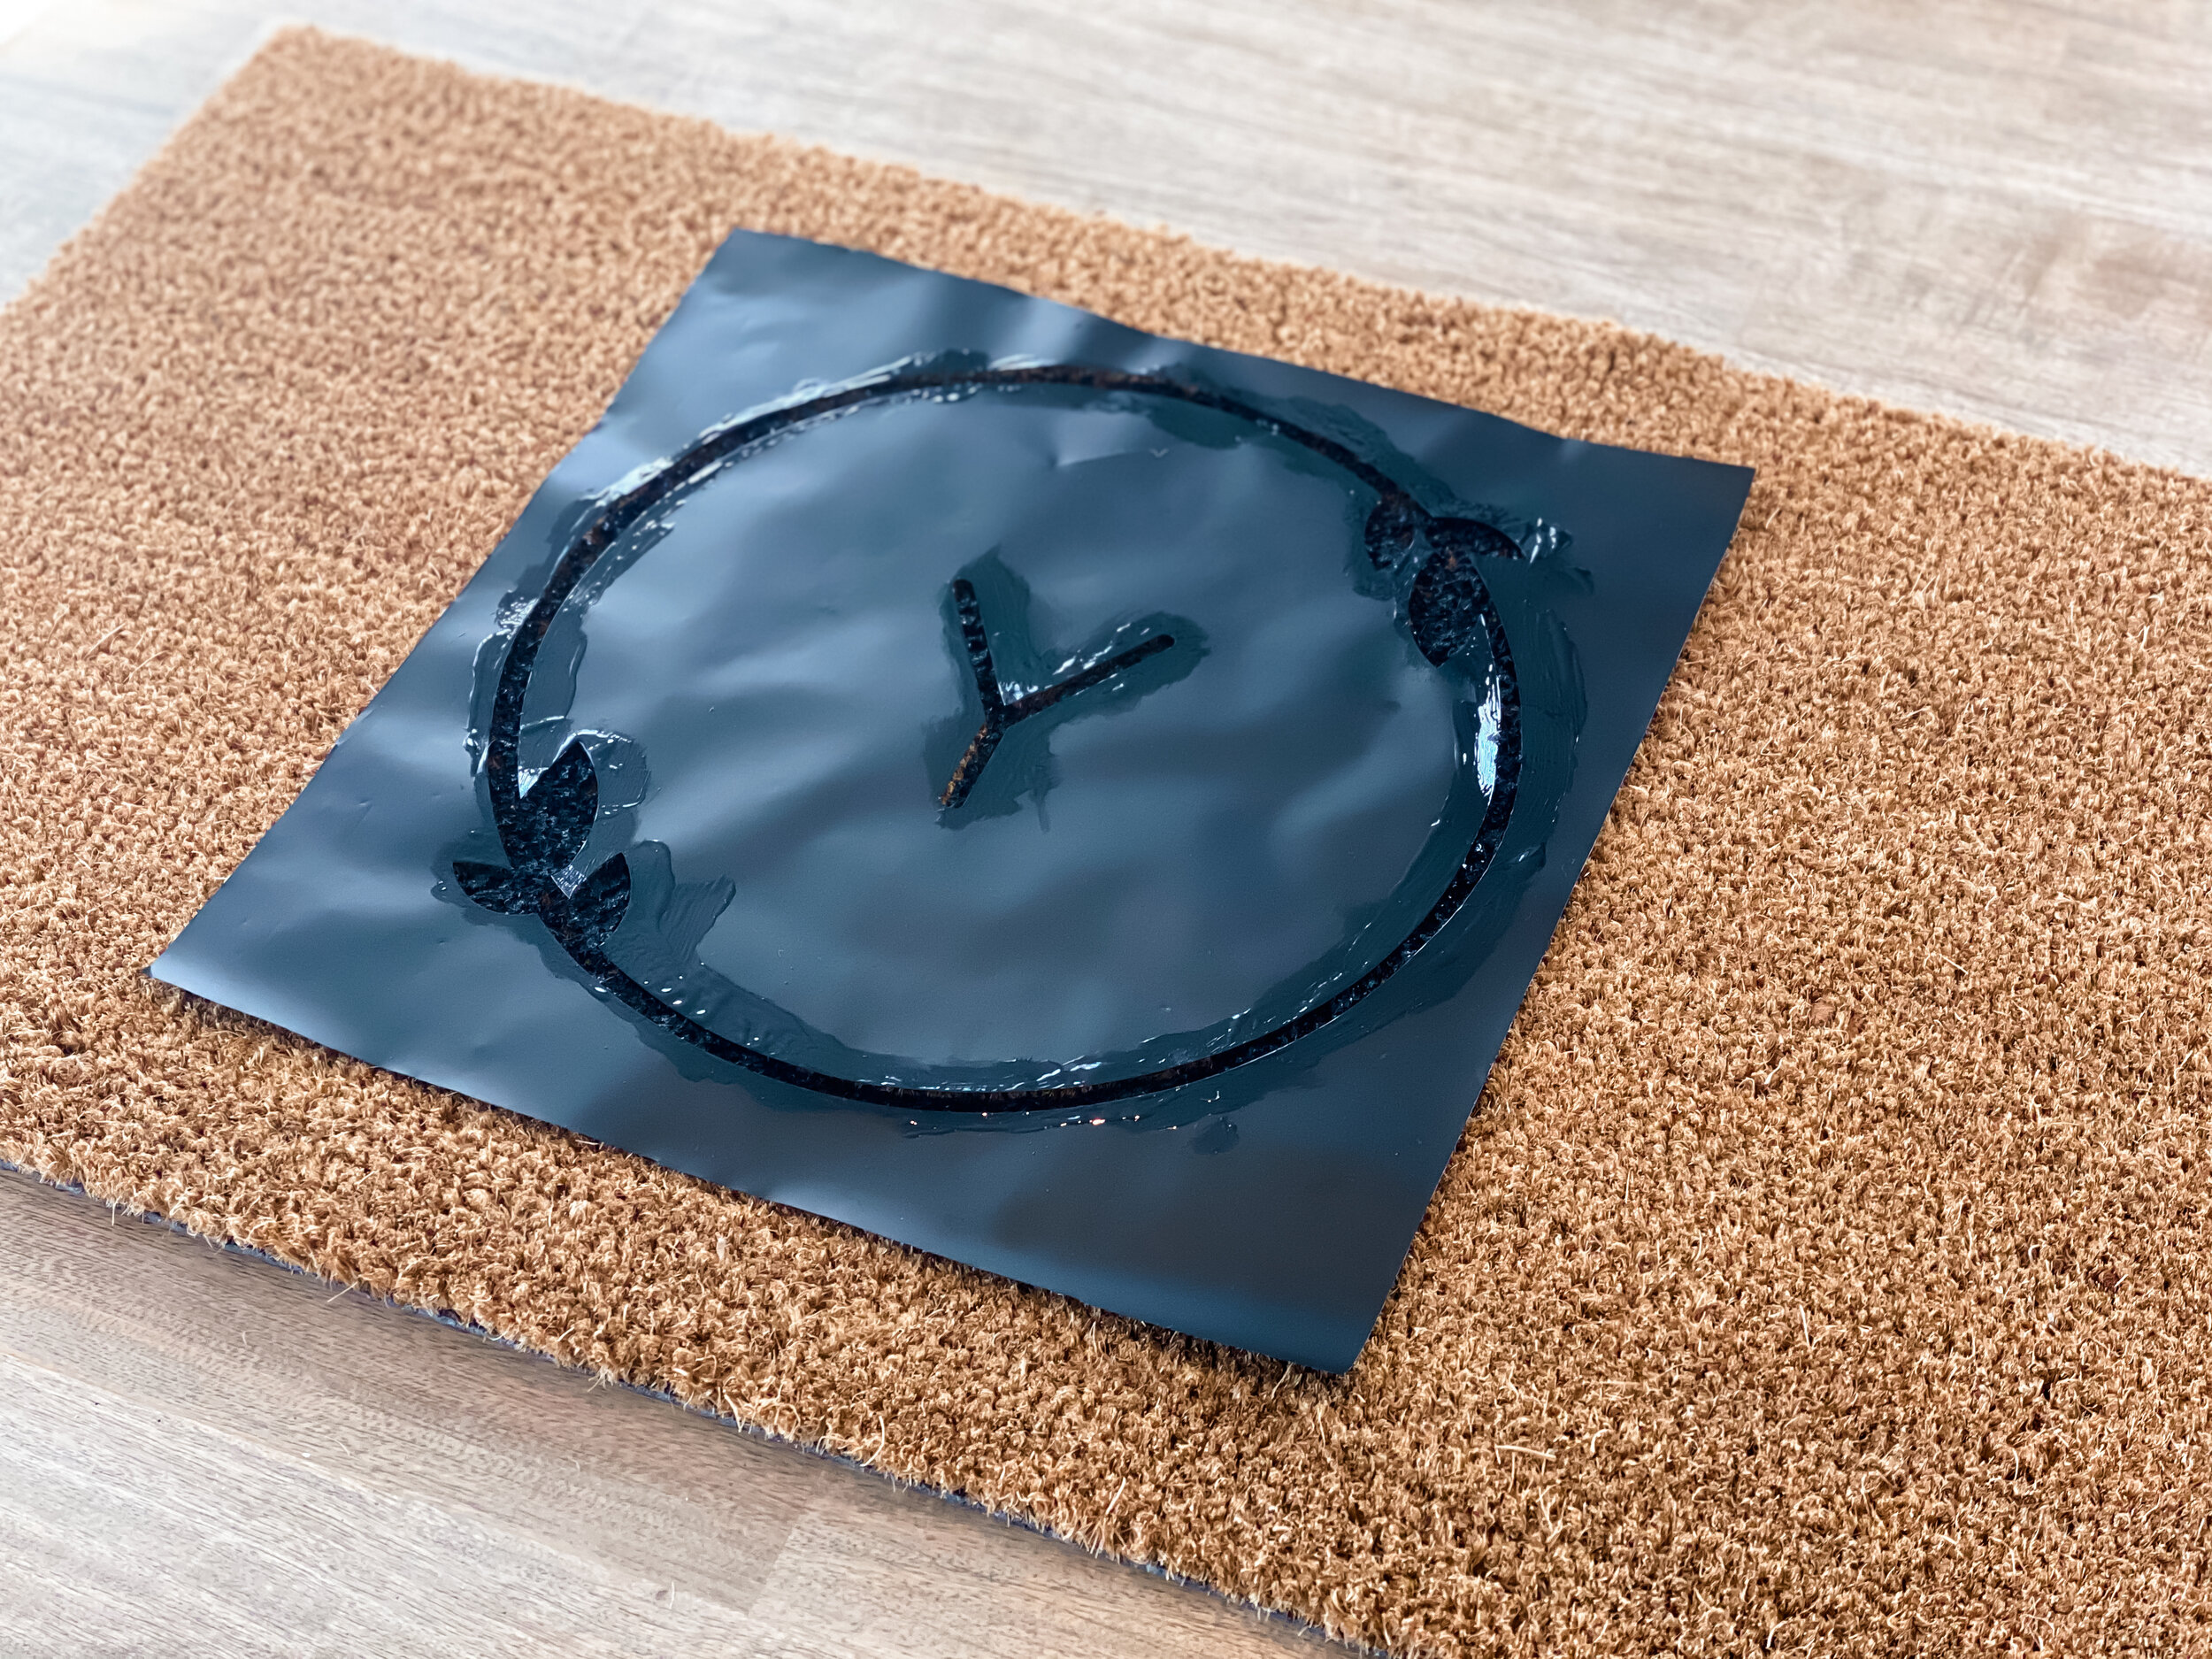
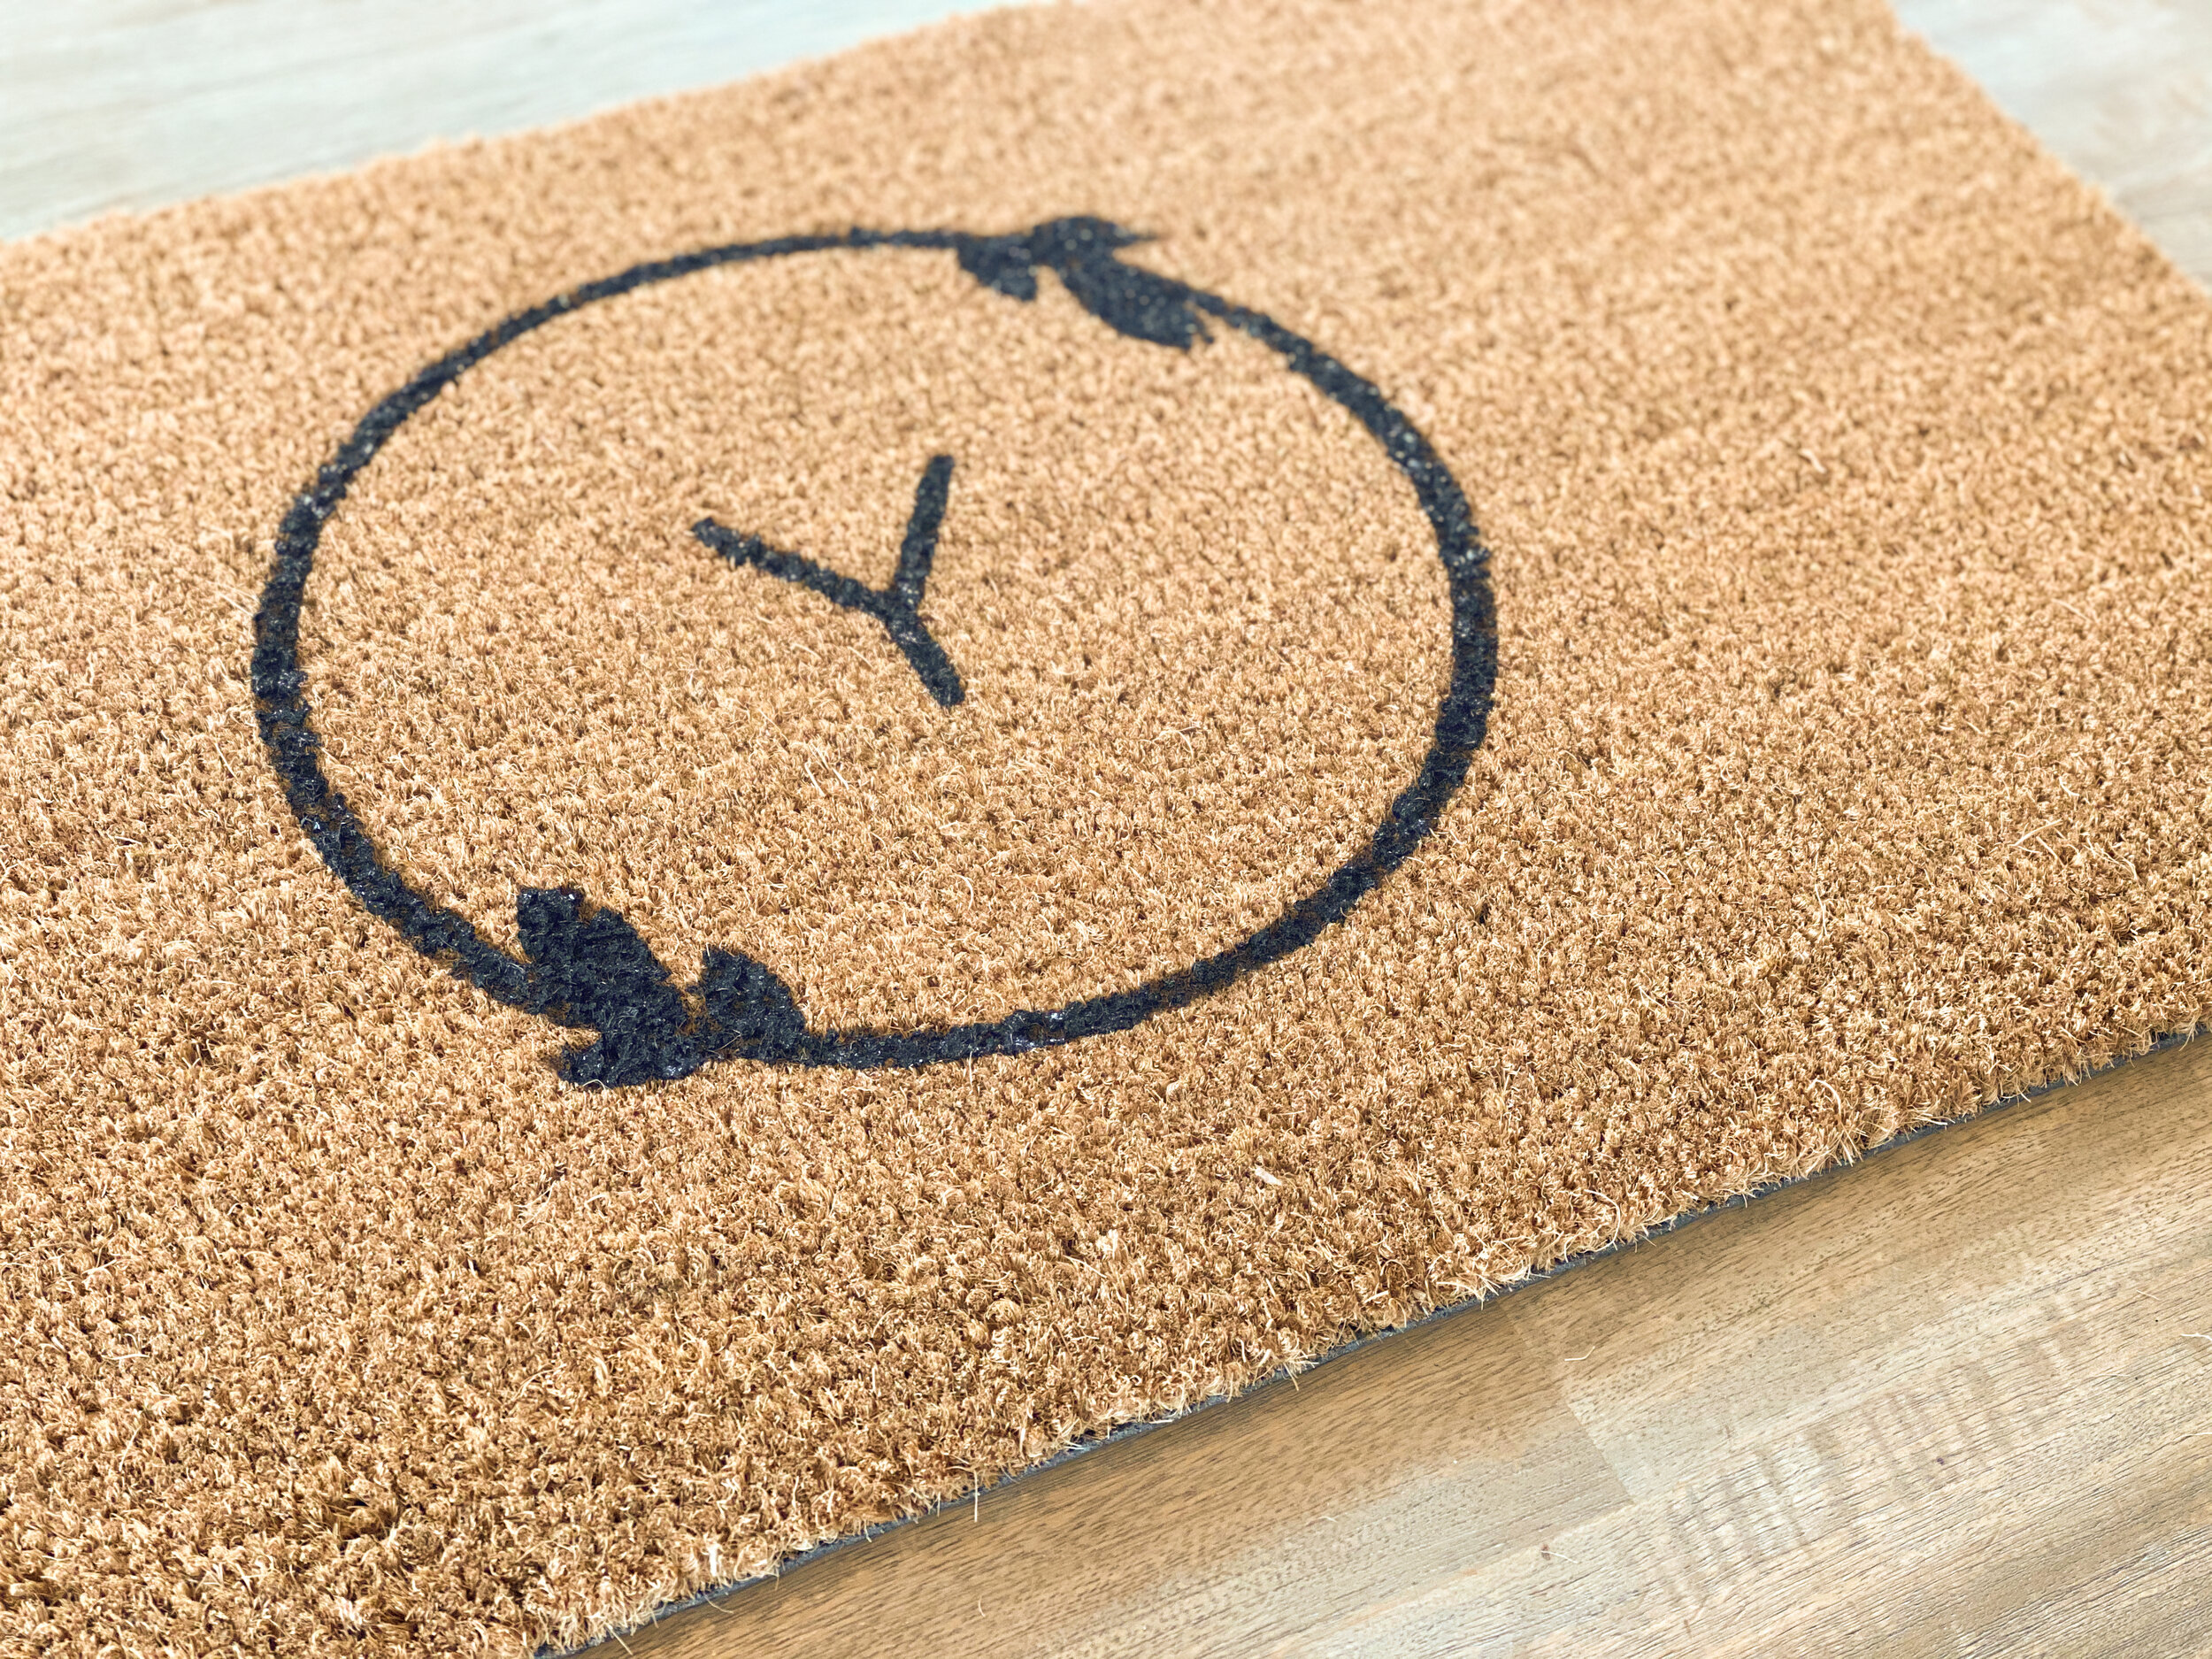
  3. Use your iron to transfer the logos to your hat and apron!

To make the Starbucks Frappuccino costume:

  1. Cut the circular Starbucks logo in green and white iron-on.

  2. Use your iron to transfer the logo to the neutral shirt.

  3. Wrap your silicone straw with green vinyl.

  4. Wrap your headband in tulle and secure with hot glue.

  5. Cut strips of white felt about 6” wide. Fold and bunch while running the center through your sewing machine. You can also bunch and use hot glue if you don’t have a sewing machine! I took a video of this part in action (linked here).

  6. Hot glue the end of a bunched felt strip to the straw. Wrap around the straw to make your whipped cream and hot glue to secure to the headband.

  7. Sew or hot glue bunched felt to the neck of the shirt.

  8. Hot glue strips of tulle to the felt to add more fluff. You can’t go wrong here!


And there you have it — DIY Starbucks Halloween Frappuccino and barista costumes! These costumes are quick and easy, great for all ages (even baby Celia!), and doable on Halloween day, if you’re in a pinch. Send us a message on Facebook or Instagram and let us know if you make a Starbucks costume for Halloween!

You've been BOO'ED: Donut Edition 2020
Donut-BOO-Images copy.jpg

Halloween, my favorite holiday, is going to be very different this year thanks to COVID-19. No Halloween parties, costume try-ons, or even trick-or-treating, depending on where you live! Since we moved to our neighborhood, I’ve enjoyed starting the “You’ve been BOO’ED” tradition and keeping it going each year. It’s fun for adults and kids alike! In previous years, I’ve filled a bucket with all sorts of random Halloween goodies, and secretly delivered it to a neighbor with the message to pass it on.

With COVID, I didn’t want anyone reusing Halloween buckets or touching things and passing them on. I thought we wouldn’t be able to BOO in my neighborhood this year — major bummer. Add it to the list for 2020, right? And then I saw Krispy Kreme’s Halloween donuts, and it sparked an idea: donuts! Drop off donuts, DoorDash style, with a cute BOO note. Who doesn’t love surprise donuts?

6.jpg

To start the tradition in your neighborhood this Halloween, download the free PDF below and print (note: it looks best printed US Letter Borderless). Get your favorite donuts, and drop them at a neighbor’s doorstep along with the two prints! It’s that easy to get in the Halloween spirit and totally make someone’s day. Let’s make the best of Halloween 2020!

Tag me @firsthouseonfinn if you donut BOO this year!! I’d love to see!


Donut artwork under license. Do not reproduce without permission.

Unicorn Birthday Party!

It’s no secret that I love a themed party. It’s truly one of my favorite hobbies! My kids get to pick a theme for their birthdays each year, and I get to work gathering things to create the party of their dreams. This year, Lydia is turning 5, and she chose a unicorn theme birthday party. Usually I decorate the whole house and invite everyone I know to celebrate, but with covid this year, we had to change things up. We had an outdoor girls’ luncheon with Lydia’s closest friends.

A balloon arch or balloon garland is my favorite party staple. They’re affordable, easy to create, and make a major statement. This pastel rainbow balloon garland made the perfect unicorn backdrop!

I made these iridescent treat bags into unicorns by adding eyes, which I drew in Illustrator and cut in black vinyl on our Silhouette machine. They turned out so cute!!

After cake and ice cream, the girls took home goodie bags filled with unicorn sleep masks, Rainbocorns, and candy. I think Lydia’s fifth birthday will be one to remember! If you have a unicorn theme birthday party in your future, check the list below for sources.


Source List:

Rachael YoungComment
Summer to Fall Transition | Porch Decor

Well, I styled our front porch in July and I’m just now getting around to posting… better late than never, right? Life with three kids and three dogs leaves little time for blogging, ha! I wanted to make a short and sweet post to get back into the swing of things. So without further ado, I’d like to share some mid-late summer front porch inspiration! The yellows and oranges work well for the transition from summer to fall, so it still holds up through September. I’m really happy with how it all came together!

 
Rachael YoungComment
One Room Challenge | Week Three

It’s Week Three of the One Room Challenge! This week, we’re tackling paint samples and demo.

We’re trying Magnolia Home Paint for the first time. We sampled (from left to right, top to bottom) Sunday Stroll, Cinnamon Sugar, and Cupola. We’ve heard nothing but rave reviews about the Magnolia Home paint, and so far it has delivered!

Note: If you’re paint sample crazy like me, you are going to love this product I found at Home Depot! SureSwatch stickers are clear stickers that you can paint with your wall color sample. They remove cleanly, and for $1 per sticker (sold as a set of 3), you can’t go wrong! I paint two of each color I’m sampling and put them on different walls so I can see the changes with lighting. Genuis product! Magnolia also sells sample stickers that you come pre-painted for you.

We landed on Cinnamon Sugar! We used up the rest of our sample paint on each side wall, and considered it the winner. Next we started demo — removing the chair rail trim along the back wall. We let the kids paint on the back wall with paint sticks while we demoed and they LOVED it.

IMG_2125.jpg
 

Stay tuned for Week Four!

Follow along on instagram @firsthouseonfinn

One Room Challenge | Week Two
IMG_2030 2.jpg

It’s Week Two of the One Room Challenge! This week, we’re taking this Charcoal Blue room and turning it white (with lots of primer)! The goal is to get the room primed for its final color, Cinnamon Sugar by Magnolia.

We will remove the white shelves and prime all of the visible walls. To save paint (and money), we decided not to prime the back wall, since it will be covered by the built-ins. For primer, we’re using Kilz Hide-All Interior Primer on the walls.

We tried getting away with one coat of primer, but it definitely needed two. The end result was just what we wanted: white walls, ready for Cinnamon Sugar paint!

Stay tuned for Week Three!

Follow along on instagram @firsthouseonfinn

One Room Challenge | Week One
blog-header.jpg

I am so excited to be a guest participant in the Spring 2020 One Room Challenge! For the next eight weeks, Garret and I will transform a room and keep you updated on the progress weekly, here on the blog. Follow along on instagram for daily behind-the-scenes looks!

What room are we transforming?

Our front room is a flexible space, currently designed as an office for a dog collar business I no longer own. This room was one of my personal Designer-DIY projects, where I took an inspiration photo from Studio McGee and recreated it on a budget. The wall shelves were chosen to hide all the dog collar supplies, since this room is the first room you see when you enter our house through the front door. I sold the dog collar business after our son, James, was born, and the room has remained untouched. The desk has become our mail/package dumping ground, and I don’t think anyone has sat in the pretty chair behind the desk in over a year.


What are the goals for this room?

Our main goal for the challenge is to turn this room into usable square footage. We plan to add storage and seating, which will make this a room the whole family can use. We desperately need first floor storage, as we don’t have another closet besides the mudroom closet. Keeping the large desk allows the room to work as an office space, while adding extra chairs turns the room into a formal dining room. We want to be able to change things around in the space depending on what we need to use it for.

Project List:

• Custom built-ins made from IKEA Billy bookcases
• Repeat the wall trim above chair rail on left/right walls
• Paint the whole room Cinnamon Sugar by Magnolia
• Spray paint chandelier black
• Source new chairs and styling elements


Before

Design Mockup

FrontOffice-Mockup.jpg
 

Stay tuned for Week Two!

Follow along on instagram @firsthouseonfinn

Weekend Project: Playhouse Makeover
IMG_1741.jpeg

One of my favorite projects to take on is a kids playhouse. You can take an out-of-the-box playhouse and make it something custom without spending much! Check Costco, Sams Club, etc. for great playhouse deals (This is our second playhouse from the brand KidKraft). Our first playhouse was inspired by 1111lightlane - the modern farmhouse playhouse of my dreams!

Adjustments.jpg
 

This new playhouse was fine out of the box (it was even already slightly stained gray), but I wanted to make it ours. We completed the whole project, including the playhouse build, in one weekend!

Biggest impact: paint. We matched the color of our house with Sherwin Williams Proper Gray, and Tricorn Black for the accents. I love that the playhouse colors match our actual house, and the extra coat of paint should help it last through the years. Note: Since the playhouse came with a light coat of stain already, I did not prime it.

I swapped out the green plastic flower boxes that came with the set for planter boxes I found on amazon. I spray painted them white and filled with pansies. The galvanized accent perfectly matches the roof! Adorable!

IMG_1709.jpeg

Subtle change that only I notice: I removed the green fabric in the triangle cutouts near the roof and replaced with Sunbrella canvas white fabric. I’m so happy with the change! It really ties everything together.

triangle-cutouts.jpg

If you’ve been thinking about sprucing up your playhouse, the time is now! You can make a big impact with just a few changes. Working on the playhouse was a great outdoor activity for the whole family, and it made another quarantine weekend fly by. Hope this inspires you!

IMG_1740.jpeg
Rachael Young Comment
Nursery Design Boards / Team Green
neutral-hero.jpg

It’s almost April, and that means baby number three will be here before we know it. 10 weeks (hopefully less) remain! We did not find out the gender for this one, and it has been killing me not to be able to design and decorate the nursery. Now that my days consist of a lot more time at home (thanks, Coronavirus), I had time to work on design boards for a neutral nursery. Finally, something I can do safely from home, while fulfilling that nesting instinct! I started with neutral furniture pieces I can order now, that would work for either gender. I then came up with two plans to layer on from there, depending on whether we have a girl or boy.

I had a grand plan to buy furniture items at our local Pottery Barn Kids outlet, but it’s cutting it too close to due date with everything shut down. So for now, I’m shopping online and bookmarking everything I want, and I do a quick check daily for sales. Retailers are running great sales right now to stay afloat and boost the economy, so chances are, you can find what you want on sale if you’re patient! I did my best to link budget picks wherever possible. So, let’s start with that neutral foundation layer:


If it’s a girl, layer on with…

girl-nursery.jpg
 

If it’s a boy, layer on with…

boy-nursery.jpg
 

Continue adding decor as your little one’s personality comes out! Buying your main pieces ahead of time will help you not be overwhelmed. Hope this helps you get started on your nursery!
Rachael

Spring Front Porch Decor: Inspiration

It’s officially March, and that means spring decorating! There are so many beautiful blooms out this time of year in stores (both faux and real), as well as planters and lanterns and so much more. It’s so exciting to come out of winter and freshen up our outdoor decor! I personally always start with my wreath and build off of that, using it as a color guide.

Ready to spruce up the front of your house but not sure where to start? I’ve rounded up two different looks for your spring front porch decor inspiration. All linkable things have been linked through LikeToKNOW.it, and I also tried to substitute things as I could. Can’t wait to see what you choose!


Blush & Yellow

Spring-Front-Porch-Decor-BlushYellow.jpg

Green & Purple

Spring-Front-Porch-Decor-GreenPurple.jpg
Rachael YoungComment
DIY-DESIGNER | Monogram Wreath Doormat
DIYDesigner-Doormat-Header.jpg
 

This year more than ever, I cannot wait for spring. I’ve already started decorating the house for spring, and the front door is my next project! I searched online for days, looking for the perfect spring doormat, and nothing really caught my eye. Then I saw this doormat at West Elm. I tried their monogram preview, and wasn’t thrilled with the font choice for the lettering. I wasn’t sure it was going to look as nice as the product photo. And for $64 + shipping… worth a try to DIY! Turns out, making your own doormat is a quick and easy project, and super affordable. Here’s how to do it!


Supply List

Plain Doormat
Multi-Surface Acrylic Paint, Black
Stencil Brush
Silhouette Cameo, Cricut, or similar (not required)
Vinyl, Any Color
Scissors, Xacto knife, Tape (if no cutting machine)
Monogram Stencil (all letters):

 
01-Supplies.jpg
 

Instructions

Estimated Project Time: 10 minutes
Dry Time: 8+ hours

  1. Print monogram template using Silhouette, Cricut machine, or similar. You can also print on regular copy paper and use scissors and/or an Xacto knife if you don’t have a cutting machine available.

  2. Stick your template to the center of your mat.

  3. Paint using your stencil! I used more of a stippling technique to really get down into the fibers. Doormat coir is very forgiving. The paint does not spread at all, so where you put it is where it stays.

  4. Remove stencil and let doormat dry overnight.

  5. Put in front of a door and enjoy!

Note: My doormat has been out on a covered porch for about a month so far with no issues. I have not tested this particular paint against the elements!


If you make this doormat, make sure to tag us on instagram so we can see!! @firsthouseonfinn

Bathroom Lighting: Pendants & Chandeliers

So far, this is the year of updating our builder-grade bathrooms! We started in the master bathroom, but then shifted to the kids’ bathroom because we want to get it finished before baby three arrives. Lighting is one of my favorite ways to change a space! Removing those builder “boob lights” and cheap vanity sconces adds an element of personalization and the possibilities are endless. Since we’ve been doing our bathrooms, I’ve spent endless hours looking at lighting options, and I’ve rounded up my favorite pendants and chandeliers for bathrooms here!

Bathroom-Lighting-Pendants-Chandeliers.jpg
Rachael Young